12. April 2011 · Comments Off on Canning 101: Or "Jam Tomorrow, Jam Yesterday, But Never Ever Jam Today!" · Categories: Uncategorized · Tags: , ,

* Name that tune!

Oh, never mind!  Here’s the whole song, just for you!  This Carol Channing act sent my sister and me into a flurry of giggle when we were little.  Prepared to have it stuck in your head for a while, ha ha!

With all those strawberries I brought home on Monday, I had to get cracking to make some of the freshest strawberry jam EVER!  For the first time since 2007, I dug out my canning supplies.

“As if you don’t do enough…you do canning?”

YES!  I remember my Mom doing it when I was a kid, and it turns out canning your own food is easy, inexpensive, and incredibly nutritious!  It’s great knowing what’s in your food!

I bought my hardware in summer 2001 when we grew so many tomatoes, I was able to preserve several jars of whole tomatoes, along with several jars of homemade pasta sauce.  I’ve used it off and on in Ohio, Florida (2002-2005) and North Carolina, but then the equipment sat dormant while we were in Nebraska.

How does canning work?

Like everything else I blog about, a little science/history lesson is in order.  According to the authority on everything, Wikipedia, home canning is the process of preserving foods by putting them in jars and heating them to kill organisms that might cause the food to spoil.  I mainly stick to the easy-to-preserve foods (strawberries and tomatoes), and I’m now comfortable enough with the process that I’d like to delve into the more challenging foods soon, such as corn and peppers.

When foods have a pH of lower than 4.6, you can effectively kill the microorganisms by simply boiling the food at 212 degrees F for a specified period of time.  This is why preserving tomatoes, berries, and pickles is so easy.  And the hardware is inexpensive.

On the other hand, if you’re interested in preserving meats or low acid vegetables (such as corn and non-pickled peppers), you need to boil the food at a HIGHER temperature than is possible by simply boiling.  Perhaps you’re wondering, “How is this possible?”  Easy: you need a pressure cooker!  A pressure cooker, which allows the air pressure inside the vessel to increase as you heat it, the boiling point of the liquid can increase over 250 degrees F!  WOW, how cool is that?  Now, you can boil the canned foods at a high enough temperature to kill even the Clostridium botulinum spores, which can’t live in temperatures higher than 240 degrees!

As I’ll discuss in the next section, venturing into the pressure canning world involves a more lofty investment in a quality pressure cooker, large enough to hold the jars.

What kind of equipment do I need?  And how much will this cost me?

If nothing else right now, get this book!  Or at least a version of this book, since it’s constantly being updated.  This is the one I have from 1999.  It offers easy guidance on what equipment you need, along with dozens of canning recipes — not just for the minimally prepared foods, but also for salsas, sauces, and assorted flavors of pickles.

The rest of the supplies can easily be found at your local Walmart.  Look in the kitchenwares section…sometimes it’ll be moved to a “seasonal” section when the tomatoes and other veggies are in full harvest.  You might or might not see the supplies at other discount department stores — in this area it’s been hit or miss at my local Target (they had salsa jars, which was cool, but that was it).

This is a “canner”.  Really…it’s just a really big pot.  If you have a large soup pot, it will do the same thing for you: hold boiling water.

This “canner” includes a nifty rack that helps you easily lift all the jars out of the pot at once.  This will hold seven jars.

I also got this “accessory pack”.  Over the years, I’ve come to only use the tongs and the funnel.  And honestly, I don’t even use the tongs all the time.  But the funnel is a lifesaver — and can be purchased separately for just $1-2!

$6.97 at your local discount department store.
My 11-year-old accessory set.

Jars, Lids and Bands.  For me this is the only recurring expense with canning…this is because I give away so many of my jams.  I lean towards the “quilted jelly jars”, which are half-pint (8 oz.) sizes, for jams and jellies.  You can get a dozen for about $9-10 at your local discount department store.  For my tomato products I look for the “wide mouth” quart-sized jars.  They take special lids and bands, but aren’t that hard to find.

Some terminology.  The “lid” is the solid round disc with the rubber gasket on the bottom.  The “band” is the threaded ring that really is only needed to hold the lid in place until it’s been vacuum sealed.  Some folks will remove the band before storage, but I prefer to keep it with the jar, helps to hold the unsealed lid on the jar when you’re storing it in the fridge.

Know that if you keep your jars, you can reuse them with the bands, and you simply need to buy new lids for $1-2 per dozen.

These lids have a special rubberized gasket that will form the seal on your jars.  They can only be used once, but the jars and bands can be used multiple times.

And finally, you’ll need the fruits or vegetables you’re planning to preserve.  If you’re making jam or jelly, you’ll want to buy some pectin, which is also found with the canning supplies at your local discount department store.  Pectin is a type of polysaccharide found in plants.  This is the ingredient that gels together jams and jellies, and is also found in natural intestinal remedies, such as fiber laxatives and stool softeners.

So let’s tally up the expenses for canning your own food:

  1. “Canner” or other large pot: $20
  2. Accessories: $7
  3. Jars, Lids, Bands: $10 per dozen
  4. Pectin: $1-2 per recipe’s worth
  5. The cost of whatever food you’re planning to preserve.
I’d say that for about $50 of up front cost, the cost of my family going out to dinner at Outback Steakhouse, you could lay the foundation for preserving foods with little-to-no chemicals.
OR: You could just hit this “Easy Button” here, which will hook you up for less than $45!

Canning 101: Classic Strawberry Jam

So imagine tapping into some fresh fruit or vegetables that were preserved a mere SIX hours after picking them off the plant!  And that you know EXACTLY what’s in the jar.

In this case, I know that this strawberry jam has only strawberries, sugar and pectin.  Of course, this recipe I’m going to demonstrate has 7 cups of sugar in the 9 half-pints of jam, so it’s definitely NOT a low-calorie food.  I’m only attesting that it’s nice to know exactly what’s in the jar.

(Two days later I made jam with half the sugar — which required a different kind of pectin that promotes more gelling — but I haven’t tasted it).

So here we go.  Let’s start with our stash of strawberries.

No…wait.  Start with the canner pot, make sure it’s filled up about 2/3 full with water and get it boiling.  It’s a large pot and you won’t want to wait for that water to boil once the jars are ready to process.

Back to the berries.  Crush the berries. I have a potato masher with which I can do this.  Looks like serious strawberry carnage here, doesn’t it?

Put the pot on high heat and bring to a boil. If you’re using traditional pectin, just put in the contents of the box with the sugar called for in the recipe. In this recipe, it’s asking for SEVEN cups of sugar (oofta!). If you’re using “low sugar” or “sugar free” pectin, read the instructions about the possible additional ingredients to be added at this point.

Allow this to boil vigorously for the amount of time in the instructions. In this case, we boiled for about 5 minutes, and this allowed the pectin to gel. You might want to use this time to get your ladle, funnel, clean jars, bands and lids ready near the pot.

You need to work quickly at this point. Fill each jar with the jam to within 1/4-1/2″ of the top of the jar. DO NOT FILL TO THE VERY TOP! You need the space to account for possible expansion of the jam while you’re boiling the jars, as explained in this link.

Make sure the top edge is clean, then place a lid on top.

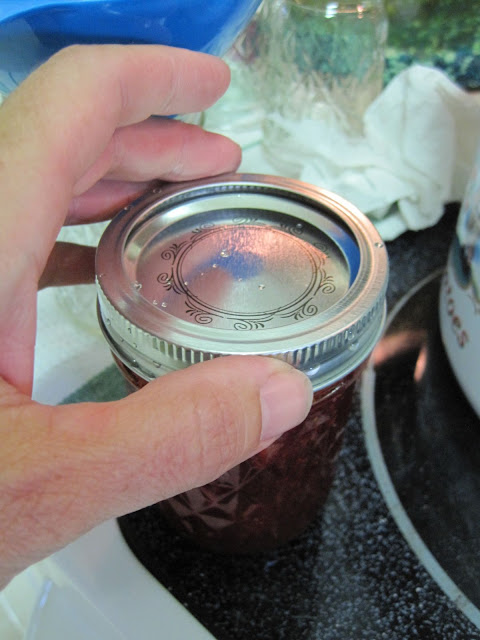
Follow it with a band, which doesn’t need to be closed super-tightly. Just tight enough that the lid won’t slide off. That tightness will loosen up while you’re processing the jars.

Now it’s time to get the jars into the canner, whose water should be boiling already.  I use a rack that makes it easy to lower/raise up to 7 jars.

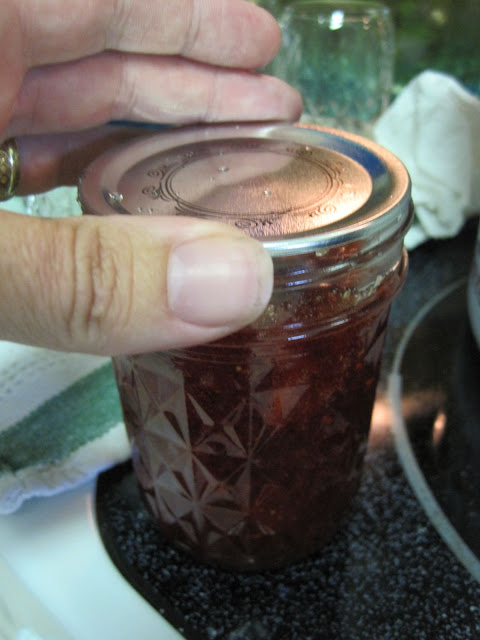
After the requisite number of minutes of boiling (15 minutes in the case of the strawberry jam), pull out the jars and let them dry off/cool on a towel. Listen for the pop — that’s the sound of the lid “imploding”. You want to hear this pop once for each of the jars you have, it’s the proof that a vacuum seal was indeed formed and your jams are good to go for up to 12 months in the cupboard!

If you don’t hear the pop, and there’s still a flexing of the lid when you press down on it, then your jam isn’t sealed. In most cases, you can simply re-boil the jar again and try for that seal. If that doesn’t work, then pop it in the fridge where it’ll last you 7-10 days.

The finished product. Some might suggest you cool the jars upside-down, to help the berries distribute better throughout the jar. I didn’t do that here, so the berries sorta drifted up towards the top.

Recipes claim that you should let the jars sit for 24 hours before using, but I don’t see why. Warm jam on some toast (in this case, potato bread toast)! YUM!

11. April 2011 · 2 comments · Categories: Uncategorized · Tags: , ,

My Double Bridge Run success back in February inspired me to sign up for this half-marathon.

I forced myself to do a deliberate training program. Starting right after the early February Double Bridge Run, I ran 2-3 x “short runs” of 3-5 miles each per week, plus 1 x “long run” approximately every week. Sometimes our family’s schedules make things a bit crazy, so that long run was about every 8-10 days instead of once a week, but it worked out well. My longest “long” training run was just under 13 miles and after dealing with that one, in mid-70s sunshine on the beach, I felt I was ready!

We were doing some Cub Scout camping in the town of Defuniak Springs, about 70 miles northeast of here, this past weekend. I left Dave and the kids at the campsite Saturday night, drove home and got a very good night’s sleep beforehand.

As is the case in most Florida warm-season races, the start time was 7am so I had to leave the house before 6am for the 30 minute drive to Pensacola Beach.

The sun was just rising as I was coming across the Pensacola Beach causeway, and you can see the low stratus clouds pouring onshore from the gulf. This is what it was like for the whole run! The clouds were great, but the 100% humidity still made it uncomfortable.

I want to show off this runner’s bib. I didn’t really pay much mind to the part of the registration about what I wanted my bib to say for a name. I never had a custom bib before. I wish I had put “Major Mom”.

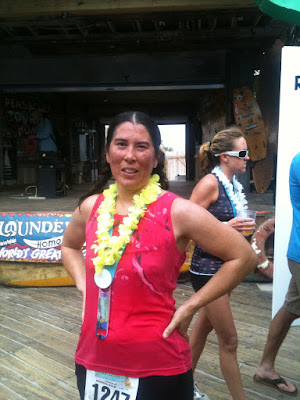
I asked a random guy to take this picture of me about 15 minutes before start time. I’m all geared up here — bandana tucked into my waistband, headphones at the ready, Nike+ sensor on my shoe, and an 800 mg Motrin pill & Clif Gel in my back pocket (the Motrin sorta dissolved in my pocket during the run, UGH!).

What’s funny about these kinds of races is that I spend so much time weaving my way through people who run rather slowly, yet are at the front of the pack when the gun goes off. It took about 3 miles before I didn’t have to worry about passing people. And then I had to go to the bathroom — rrrr! With the incredible humidity I had chugged a LOT of water just before the start, and it was catching up with me. So I took a 2 minute potty break at the 3-mile point. There was a race photographer right by that porta-john so I’ll have to see if there are pics of me waiting, ha ha!

Other random thoughts while I was racing:

  • We were running on roads that were alongside the beaches. There were so many dead crabs on the roads…and people were just crunching away at those crabs!
  • Even though the roads were closed for the race, there were still cars on our route, driving just as fast as we were running. That exhaust didn’t help one bit!
  • I got to see the race leader pass me when I was at about 5 1/2 miles heading east. The westbound route in the opposite direction was just past the 9 mile point. Whoa….
  • Even though the course was flat flat flat (yay!), the cant in the road on the curves was tough on my ankles.
  • At the end of the Air Force marathon there’s a loopy type of thing at the end…you’re coming a little down a hill and the finish is right in your face, but then you turn AWAY from the finish line and do another 1/2 mile or so weaving through the Air Force Museum outdoor displays before you get to the finish. In this race, the weaving and looping around is done in other parts of the course, so when you are heading in the last mile towards the finish, it’s a straight shot! Thanks for that!
  • The last mile or so was pretty tough. By then, you’re among a group of runners with similar experience and training, we’re all going at the same pace, and we were all stopping to walk for little spurts here and there. We saw someone get hit with a pretty bad cramp and an ambulance had to rescue her. I felt rather insensitive passing her with the EMTs and not saying anything, but what do you say to someone about get put on a stretcher? She was probably feeling crappy enough…

I had set a goal for a 2 hour race, but I don’t know what I was thinking. In my training runs I never ran that fast, and perhaps a more realistic goal would have been 130 minutes. I finished in 127 minutes and I’m thrilled at that!

This is my soaked-in-sweat picture about 10 minutes after finishing. That humidity took a toll!

My info is just above the halfway point of this list.  These are the preliminary results, before all the runners had some in (or not come in, in the case of some of them).  Once the results were official, I somehow went from placing 440 to 380.  Official results are here.

The finisher’s medal…and my inspiration for this race — we needed a good strong bottle opener!

What’s next? I don’t know. There’s a Pensacola Fiesta 10K on the 30th that I’m interested in, but I think the kids’ sports might impact that. We’ll see. Folks say it’s a very beautiful point-to-point course that ends in the historic Seville Square part of the city. That’s actually a hilly race (yes, hills in Florida!) and it’d be a good challenge. Other than that, there are no more long-distance races in the area until the fall.

Love that name!  It’s the name of our nearby you-pick strawberry farm.

This post will be about our strawberry picking experience, which wasn’t quite as nice as The Vollmer Farm in North Carolina, but it has the Bellevue Berry Farm in Nebraska beat, hands down!

My next post will cover the strawberry jam I made out of about 3/4 of the berries we got!

If you’re east of the Mississippi, chances are you’ve had a chance to enjoy some Florida strawberries.  Plant City, Florida is the “winter strawberry capital of the United States”, shipping about 3/4 of the nation’s berries throughout the country in the midwinter months.

Right about now the Florida harvest is wrapping up and folks are getting less Florida berries and more California berries.  I personally think there’s a HUGE difference!  Florida berries are bigger, redder and tastier!

Can’t you tell here?

I can’t believe how beautiful these are!  Sorry, no smell-o-blog.

One of the neighborhood moms put out a Facebook invitation over the weekend to meet at the local Publix parking lot, and then car pool up to the berry farm. Akers of Strawberries is about 40 minutes northeast of Navarre, and it was a fun trip. I took a couple of the older kids in my truck along with Jacob and Timmy, and they enjoyed watching Return of the Jedi on the ride.

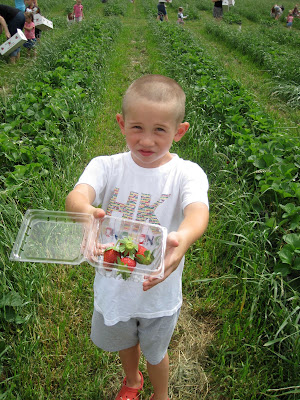
There was a Navarre area Moms group also up at the farm and we were invited to join in on their group rate, which was $5 per child to fill a small microscopic container with berries and then get a small frozen strawberry yogurt.  Here’s Timmy showing the container the kids were given:

The berries were so big, you couldn’t fit that many into the pint-sized container.

This wasn’t as great a deal as it sounded.  At $1.50 per pound, and $2 for the frozen yogurt, this was more like $3.50 worth of product for $5.  Many of us put down the money without realizing what we were getting into.  Oh well, the kids were happy and that’s what counted, right?

Right?

So…we picked out about 9-10 lbs. of berries total.  Jacob and Timmy, despite not really liking strawberries unless it’s in Go-Gurt form, really enjoy looking for that perfect berry.

I was attempting to recapture a picture I took of the boys in 2007 in North Carolina.  
Good thing I was wearing a red t-shirt!

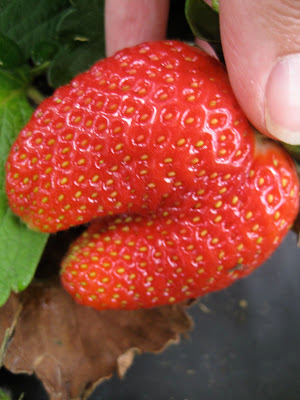
MANY of the berries had this siamese-twin thing going on.  Made the berries much bigger, however….

…you were left with this gaping hole that seemed like it would be a breeding ground for mold, bugs and other yuckies.

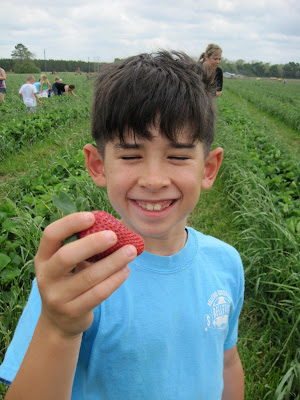
Jacob couldn’t help but laugh at the “funny berries”

We filled up the two small microscopic containers and part of a cardboard flat with some HUGE berries, enjoyed our picnic lunch we brought, and then had the frozen yogurt.  I had mine on top of a strawberry shortcake (homemade shortcake) and it was one of the best I’d ever had.  I’m sorry I didn’t take a picture of it.

Here’s our stash of berries, about 1/3 of which were made into jam 6 hours later!  But that’s for another post!

06. April 2011 · Comments Off on Florida Discoveries 8.5*: Kayaking! · Categories: Uncategorized · Tags: , , , , ,

*I’ve had to do some re-numbering with my Florida Discoveries posts, so instead of re-numbering everything, I just stuck a “0.5” in there.

How many of you remember this video from Sesame Street?

For years and years and years this was my perception of kayaking.  Being sealed into this fiberglass tube-thingy as if you have no legs and navigating river rapids.  And of course being able to flip around like this guy (allegedly Jim Henson) does at the end.

Last week as a surprise for my sister and nephews, we borrowed a 2+ man ocean kayak from our friend/neighbor/former commander Mike D.  This is different than the traditional, competition kayak that I was more familiar with (but had never done).

I’d been canoeing many times — Girl Scouting, in college, in Louisiana on the Sabine River — but kayaking is somewhat different, and in many cases it was easier.

The first day we took the kayak out to Navarre Beach, we were mortified at how tall the waves were in the Gulf (it was chilly and windy), so we packed everything up and ran about 500′ across the parking lot to the Santa Rosa Sound side where things were much calmer!  We all took turns taking short trips out.

After my sister’s family left last weekend, we took a trip to the beach again, this time so Dave and the kids could try out the kayak.  The gulf side was nice and calm, and we all got a chance to paddle out towards the dolphins!

Here are pictures from our two kayaking trips.

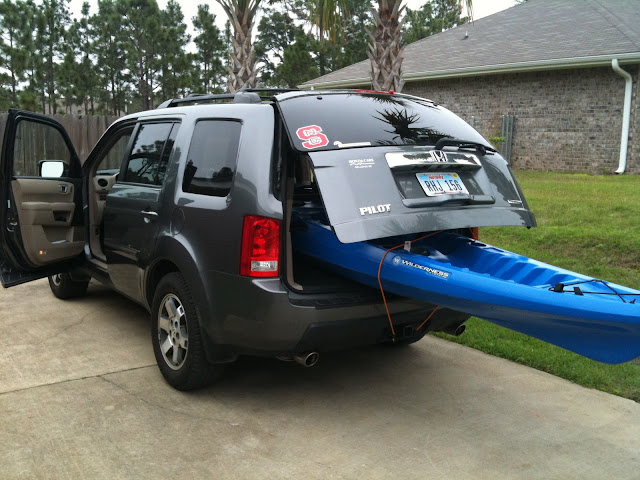
I believe it was a 130″ long kayak (just under 11′).  So here’s how it looked packed into our suddenly-small-looking SUV.  Luckily we were only transporting it about 5 miles, or 10 minutes drive.
More »
06. April 2011 · Comments Off on Florida Discoveries 8: Pretty Camellias · Categories: Uncategorized · Tags: , ,

Today I was in downtown Fort Walton Beach to pay a visit to the local running store. Between the parking lot and the store you walk through a pretty camellia garden. These variegated ones caught my attention.

Enjoy!  Click the picture to see it in better detail.

04. April 2011 · Comments Off on Florida Discoveries 7: Emerald Coast Science Center, Fort Walton Beach · Categories: Uncategorized · Tags: , , , , , ,

My sister Margaret and her 3 sons were in town most of last week.  It’s always really wonderful when my sister’s family visits.  All 5 of our boys are almost like a pack of wolves, they rarely fight, and Margaret and I can talk talk talk talk talk talk talk…..

Did I mention we talk?  We were up till 1-2am every night they were here…

Ironically, the weather was fabulous for the 5-6 days prior to their arrival, and on the day they left, it was once again sunny and warm.  They were greeted with windy, cloudy days, complete with a severe weather outbreak on one of the days!

But that didn’t stop us.  I’ll write about our chilly kayaking trip in my next post, but for now I’ll discuss the activity we did on the one day I took the boys out of school.  It thunderstormed most of the day, so we visited the Emerald Coast Science Center in Fort Walton Beach, which is about 30 minutes east of us.

It’s a small operation, probably about 2 hours total to see the whole thing.  And that was with 5 very curious, geeky boys.  They enjoyed it just the same, they were especially interested in the hands-on activities, such as the bubble tables and the interactive health and anatomy areas.

Enjoy some pictures from our afternoon.  After we visited the museum, we met up with our friend Lisa who lived nearby.  By then, the rain had stopped and the boys enjoyed a couple more hours at Fort Walton Landing park.

Just off Highway 98 in old historic Fort Walton Beach.

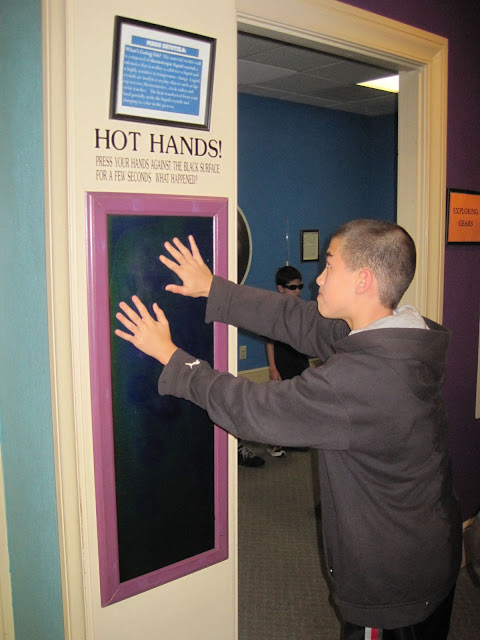
The kids didn’t seem to care that this “Hot Hands” exhibit didn’t really work anymore.

Playing with the Van De Graff machine.

This was fun…you open/close the mirrors to make the mice multiply.

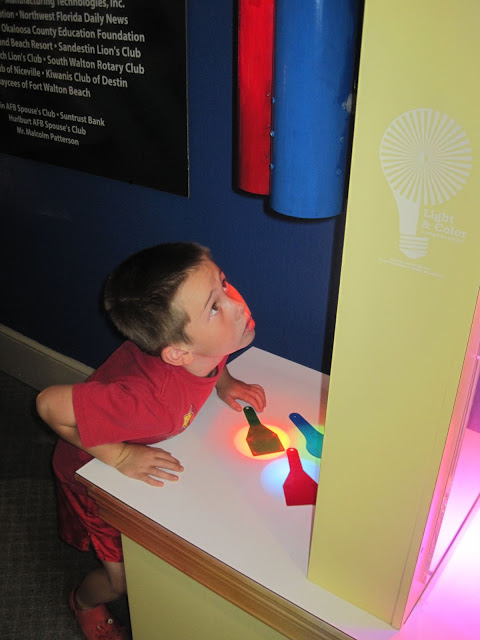
Timmy trying to figure out how the color lights work for this exhibit.

The bubble room was by far the most popular area!

Quite a face, huh?

The boys were having contests to see who could make the longest bubble!

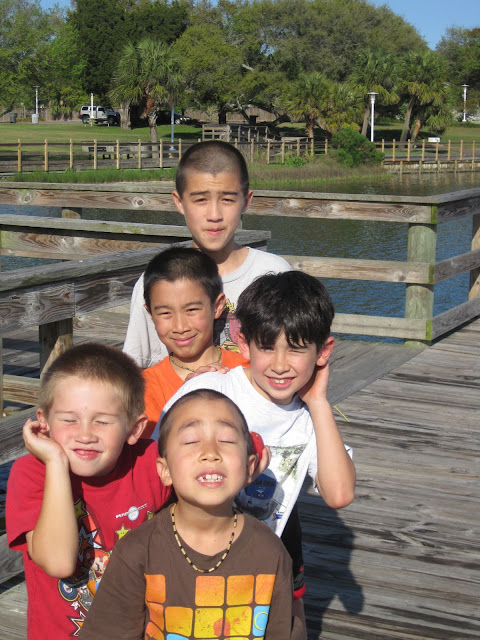
This had the makings of a really great picture, except for the little ones having their eyes closed….

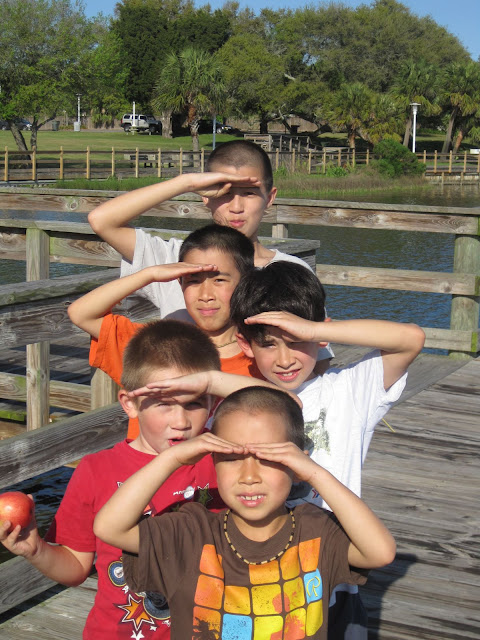
So we suggested they shade their eyes and this is what we got….