17. November 2016 · Comments Off on Half-Bath Mostly DIY Transformation: Finished! · Categories: Uncategorized · Tags: , , ,
img_8616

Before… (and pardon the blurriness of the photos…it was tricky getting photos in the small space.)

img_8634

After. To get these views, I’m taking selfies with the camera in the corner of the bathroom.

We are finished with our half-bath upgrades (and hopefully home improvements in general for a while)! Over the 3-and-some-change years we’ve lived here, we’ve done an assortment of little things to make our main floor half-bath look a little nicer.
More »

13. November 2016 · Comments Off on DIY Stairwell Transformation: All Done! · Categories: Uncategorized · Tags: , , ,

Back in October, while the contractors were working on the bathroom, Dave and I stained the banisters of our stairwell. Wow what a difference it made!

img_7436

This is just before taking off the masking and putting on the polyurethane gloss coat.

We used the General Finishes Java Gel Stain. Be sure to take your time thoroughly masking the areas. I used brown paper instead of taping several inches down the balusters. After “washing” the oak-colored surfaces with liquid sander deglosser, I used an old clean sock to apply the stain on the broad areas. If you put the sock over your hand, like I had, be sure to wear a rubber glove — the stain will stain your skin for several days. For the fine detail area (such as the underside of the railings near the balusters), a small foam brush worked just fine. More »

13. November 2016 · Comments Off on Half Bath Mostly-DIY Transformation: A Bunch of Little Things · Categories: Uncategorized · Tags: ,
The half bath as of today. There's one more task before I'll be truly happy with it...

The half bath as of today. A bunch of small improvements have turned it into an elegant space we aren’t embarrassed to show to visitors. There’s one more task before I’ll be truly happy with it…an updated mirror.

If you thought the upstairs bathroom was small, well, the half bath on the main floor of our house is REALLY small! Nonetheless, we were frustrated with the white tile counter—mostly because of the grout—and went with a similar resurfacing as the upstairs bathroom. But a different color.

The next thing about to happen is a frame around the large mirror. Dave and I can’t stand those mirrors, but as we learned from the kids’ bath upstairs, removing the mirror might take the wall with it…but we found a website called MirrorMates.com that offers peel-and-stick frame pieces for plate-glass mirrors such as these. So we ordered one. I’ll let you know how it looks. More »

12. November 2016 · Comments Off on Bathroom Transformation: The Final Reveal · Categories: Uncategorized · Tags: , , ,
Those little touches like faucets, mirrors, and lighting took us months to figure out.

Those little touches like faucets, mirrors, and lighting took us months to figure out. We are all very happy with the green color that Timmy helped to choose.

This past week we finally were able to put the finishing touches on the upstairs bathroom. At the last minute (while I was in Hong Kong) the plan for the bath towel bars changed: we decided to find a double-towel-bar version in the same design. Installing it was trickier than we thought, and some wall repairs had to be made. In addition, we had the bathtub and tile around the bathtub resurfaced as an alternative to replacing everything in that space. It’s more economical, and besides, the existing bathtub was VERY GOOD quality. There were some chips on the enamel that the resurfacing resolved.

Here are some pictures of the finished product. It isn’t the biggest bathroom, so it was a tight squeeze to get all the pictures I wanted. Enjoy some before-and-after collages too. More »

29. September 2016 · Comments Off on DIY Stairs Transformation: Our Trickiest Stain Job Yet · Categories: Uncategorized · Tags: ,

We’ve been doing a lot of little updates around the house lately. The most recent one I shared was with the fireplace last spring. I’ve been working full time off and on since July, but now I have a break for a couple months and I can return to our “honey-do” list.

There are some items that I usually do around the house in the fall: waxing the vehicles, cleaning out closets and the garage, and getting folks in to do preventive maintenance for our HVAC system. But this fall we are adding a couple of other things. More »

02. August 2016 · Comments Off on Creating a Smart Home: Major Mom Style · Categories: Uncategorized · Tags: , , , ,
Smart Homes are coming. You can't escape it...

Smart Homes are coming. You can’t escape it…

Earlier this summer our family took our annual trip “east”. For the past several years we had been flying east, but this time we drove because we’d be spending quite a bit more time visiting with friends and family. The boys and I were “out east” most of the month of June, while Dave flew out for the latter part of the trip and drove home with us.

We visited our friends Don and Maryann in North Carolina. Their home was pretty well set up with a number of devices that were all tied together with their Amazon Echo. They could control lights, the door locks, and even their holiday decorations with Alexa. They were working on tying a humidistat into the system while we were visiting.

We also visited our friend Lisa, who lives in St. Louis. She was similarly increasing the intelligence of her home with WiFi enabled lighting and door locks.

Home automation had been on our family’s mind quite a bit. We were worried about crime in Colorado Springs, and our own neighborhood isn’t immune to that. More »

Cleaning up a big mess...

Cleaning up a big mess…

I’m doing a little housekeeping in my blog world this week. One of the things I was trying to straighten out turned into a monumental mess last week, for which I apologize.

I’m trying my hand at a capability called “IFTTT.” Which stands for “If This, Then That”…it’s a website where you can connect social media, blogging, mobile apps, and even smart home apparati together and you can have things work together pretty seamlessly. I like the idea of it, but I’m still learning here. More »

The final result. I LOVE it!

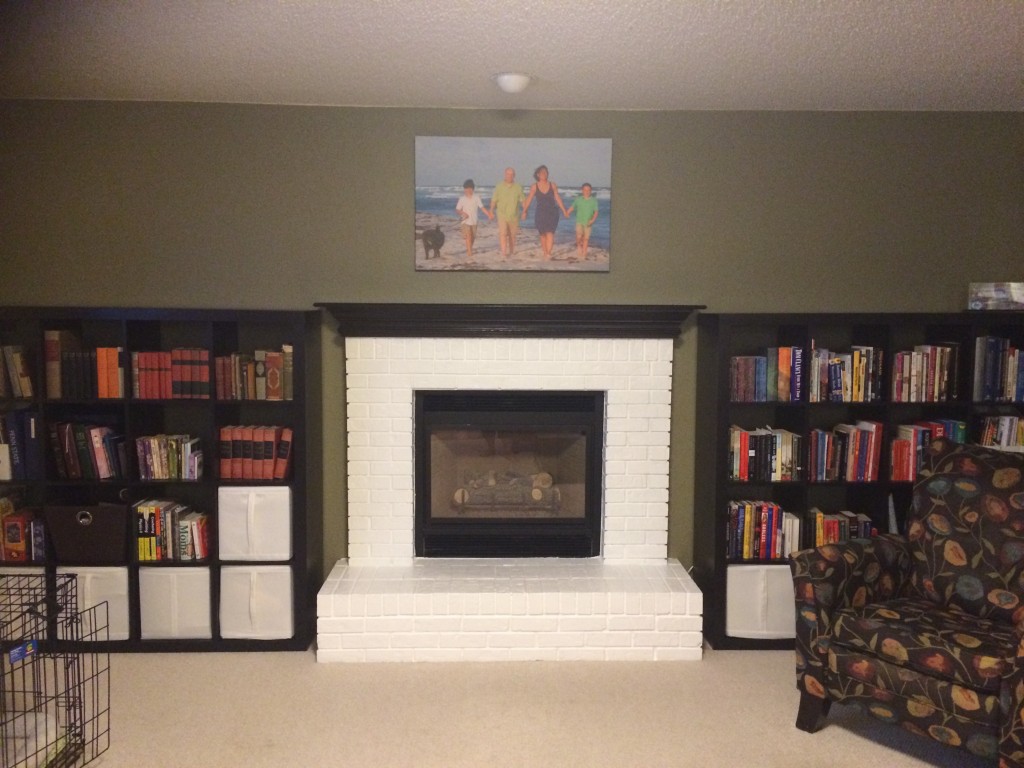
The final result. I LOVE it! We have a few things to still put back but we are waiting for the mantel to completely dry.

Tonight Dave finished up the fireplace paint job. Today’s work was mostly just correcting the bleed-under at the tape lines.

(That’s a whole other rant: we have tried EVERYTHING and can’t seem to find a masking tape that can completely avoid bleed-under. We invested in the good “Frog Tape” and we’ve tried the 3M “Blue” tape. Those run $6-8 per roll but I think we do a better job just not taping at all and being VERY careful. /rant).

Jacob thought the fireplace was looking very bright as Dave was working on it, but once we put the bookcases and white baskets back in place, he seemed to warm to the color.

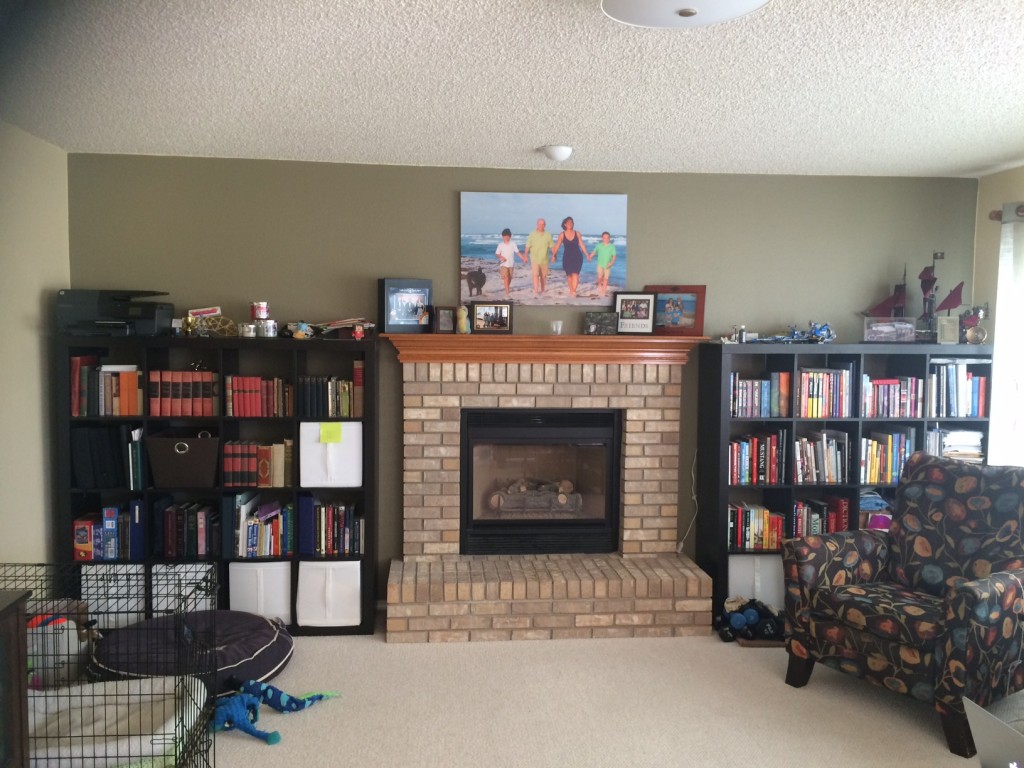
For reference, here is a “before” picture:

Our next (small) DIY project, freshening up our fireplace.

And for fun, here’s a “really” before picture, from when we walked through the house right after going into contract in May 2013:

DSC_2626

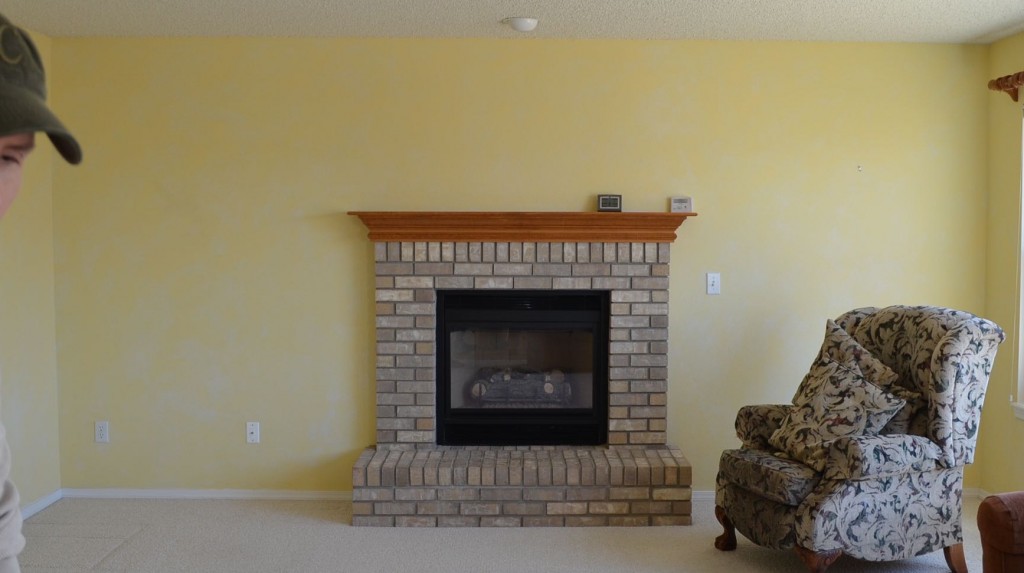
From May 2013. No, your eyes aren’t playing tricks on you. The walls were “blotchy yellow” on purpose. Some sort of feather painting thing, I guess.

Many thanks to my dear husband for making this happen.

12. October 2015 · Comments Off on DIY Guest Room Transformation: Planking the Wall! · Categories: Uncategorized · Tags: , , ,

IMG_5195

I’m not sure it’s actually called “planking”, since my first thought would have gravitated towards this kind of planking. But it’s what I’m calling the process Dave and I went through today, putting the planks up on the wall in our guest room.

We picked up the wood, called blue stainbeetle kill” ponderosa pine, at our local Home Depot. The planks are actually cut for paneling on the opposite side, and there are tongue-and-groove cuts on the long edges…for vertical paneling. I’m sure Home Depot was happy that we were picking the most beat-up planks for our project. We purposefully took the pieces with holes and gashes. More »

Most of the room is this color: Behr Ultra Premium Plus in a color called "Dry Pasture".

Most of the room is this color: Behr Ultra Premium Plus in a color called “Dry Pasture”.

We couldn’t have asked for a more perfect day to paint a bedroom. Even though it’s mid-October, today Colorado Springs hit a high temperature of 87F, shattering the record for this date by FIVE DEGREES! We were able to open the windows and let the warm air quickly dry the walls and we were able to put both coats of color on the walls in about 4 hours.

The colors we chose were ones that we already had from previous painting work. The greenish color is Behr’s Ultra Premium Plus “Dry Pasture“, which we already have on our dining room and basement bathroom walls. We had a full can of Dry Pasture in the basement storage area, which ended up taking care of about 85% of what we needed. Isn’t it always like that? Dave ran to our local Home Depot and picked up another can while I worked on the corners and top edges. More »