Search Results for: huli huli

01. June 2009 · 4 comments · Categories: Uncategorized · Tags:

So on Thursday night we cooked up the marinated Huli Huli Chicken. Part 1 of this post was pretty simple, make up the marinade, dump in the chicken parts and let ‘er soak.

The cooking is the tough part. Because of the sugar content of the marinade, you have to be VERY careful how to cook up the parts. Low low low, probably for 20+ minutes, then you can turn up the heat at the end to give a nice crispness to the skin. I guess I could invest in one of those rotisserie cooker thingies, but we’re lazy and just want to throw the gas grill.

So that’s what we did, threw the parts on the grill.

What we SHOULD have done was roast the chicken first for a bit, or microwave it first, then throw the parts on the grill.

We foul this up (no pun intended) EVERY TIME! We cook the parts, then serve it up, then frantically attempt to keep the rest of dinner warm while we nuke up the chicken so the near-bone areas finish cooking, all the while drying out the exterior.

So enjoy some pictures of Dave cooking up the chicken, we’re smelling it, hearing it sizzle, looking at it cook up golden brown and delicious…

From 2009 05 26 Huli Huli Chicken I

Looks WONDERUL, doesn’t it? Unfortunately, at the time it was brought inside, it was still raw up against the bones. Darn it! We had to microwave it for 2-3 minutes after grilling to finish it up.

So word to the wise: if you want to try my recipe, bake the chicken, or microwave it for a few minutes before grilling, at least long enough to cook the meat up against the breastbone and thigh bones.

31. May 2009 · Comments Off on Huli Huli Chicken, Part 2 — The cooking challenge! · Categories: Uncategorized · Tags: , , ,

So on Thursday night we cooked up the marinated Huli Huli Chicken. Part 1 of this post was pretty simple, make up the marinade, dump in the chicken parts and let ‘er soak.

The cooking is the tough part. Because of the sugar content of the marinade, you have to be VERY careful how to cook up the parts. Low low low, probably for 20+ minutes, then you can turn up the heat at the end to give a nice crispness to the skin. I guess I could invest in one of those rotisserie cooker thingies, but we’re lazy and just want to throw the gas grill.

So that’s what we did, threw the parts on the grill.

What we SHOULD have done was roast the chicken first for a bit, or microwave it first, then throw the parts on the grill.

We foul this up (no pun intended) EVERY TIME! We cook the parts, then serve it up, then frantically attempt to keep the rest of dinner warm while we nuke up the chicken so the near-bone areas finish cooking, all the while drying out the exterior.

So enjoy some pictures of Dave cooking up the chicken, we’re smelling it, hearing it sizzle, looking at it cook up golden brown and delicious…

From 2009 05 26 Huli Huli Chicken I


From 2009 05 26 Huli Huli Chicken I


From 2009 05 26 Huli Huli Chicken I

Looks WONDERUL, doesn’t it? Unfortunately, at the time it was brought inside, it was still raw up against the bones. Darn it! We had to microwave it for 2-3 minutes after grilling to finish it up.

So word to the wise: if you want to try my recipe, bake the chicken, or microwave it for a few minutes before grilling, at least long enough to cook the meat up against the breastbone and thigh bones.

27. May 2009 · Comments Off on Huli Huli Chicken Part 1 — a childhood memory comes alive! · Categories: Uncategorized · Tags: ,

It’s time for another recipe blog!

I don’t remember all that much in my life before about age 4.  I don’t know why, I just don’t.  Just the intermittent here-and-there memory.

My family was living in Hawaii when I was 4-years-old.  My Dad, who was in the Navy, was stationed at this small base northwest of Honolulu.  My first solid memories were from Hawaii.

And here’s one of them: Huli Huli chicken fundraisers.  Click here for a history of Huli Huli chicken (thanks to the obituary of the inventor from 2002).  I vaguely remember driving up to a large dirt/gravel parking lot, perhaps at a church or a high school.  And you’d see row-after-row of rotisserie-like skewers, all covered with chickens.  I also have vague memories of large metal trash cans to hold the marinade (this was in the 70s, well before plastic trash cans, apparently), and folks using cotton mops to slop on the marinade on the skewers.

My Dad mentioned to me once that the chickens would be sold whole for just a few dollars (I think he said $5, but I could be wrong), and they’d be wrapped for you in newspaper!

I found this nifty blog entry here about a modern-day operation on Oahu.

As for this blog entry, what I’m going to present you is a recipe that seems to bring back the memories I had, but I’m sure someone will tell you that it’s wrong.  I’ve had chicken made with commercially purchased “Huli Huli Chicken Sauce” and that just seemed WRONG WRONG WRONG.  Too syrupy, from what I remember.  If you do a web search for “huli huli chicken recipe” you’ll come up with a very wide variety of recipes.  I see ginger, sugar and garlic as a common thread throughout, but from there you’ll see varied other ingredients: limes, chiles, honey, ketchup, white wine, etc.

Here’s the recipe:

From 2009 05 26 Huli Huli Chicken I

That’s my sister’s handwriting. She’s now quite the vegetarian, but she wrote out the recipe card for me and I still have it today. I didn’t photograph the back of the card, but suffice it to say that the back merely says to cook the chicken :-).

Let me go through the preparation steps I took today, so we can have huli huli chicken on Thursday night.  First, let me introduce the ingredients:

From 2009 05 26 Huli Huli Chicken I

There’s “Sugar in the Raw” in the orange sugar dish. Maybe because it’s really-truly from Hawaii, I am using it instead of plain white sugar. I feel more authentic that way…

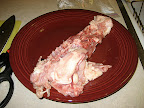
Note the whole chicken…let me warn you, I’m about to show pictures of a chicken dismemberment, so if you’re adverse to such images, click away now!

Let’s first disassemble the chicken.  When I’m motivated enough, I choose to break up a whole chicken rather than buy the parts separately…it’s cheaper and I can take advantage of ALL of the chicken for broth, soup, etc. The first thing I did was take my kitchen shears and CUT down both sides of the spine.

From 2009 05 26 Huli Huli Chicken I

Now I can take the spine/back part and toss it into my freezer bag that already contains two other chicken backs…I’ll probably make up some broth this week for recipes later.

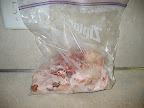
Moving right along…I got sick of cutting a little bit of the chicken, then washing my hands, taking a couple pictures, then going back to cutting, I decided not to photograph the rest of the disassembly.  I cut the remaining chicken into 2 breasts, 2 leg quarters and 2 wings.

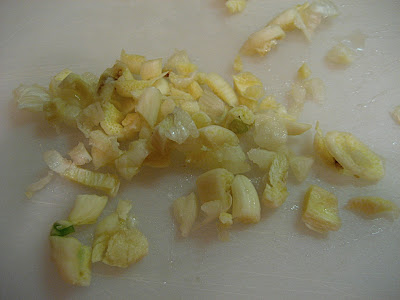
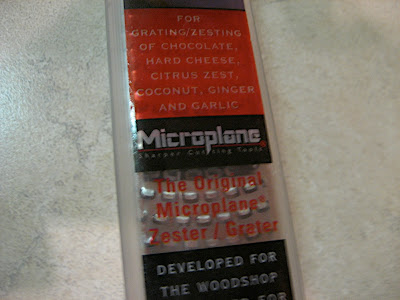
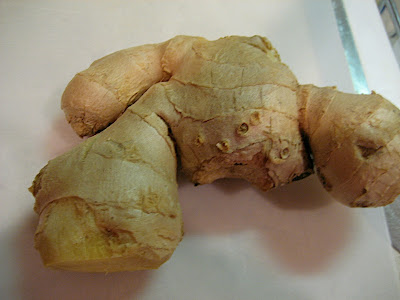
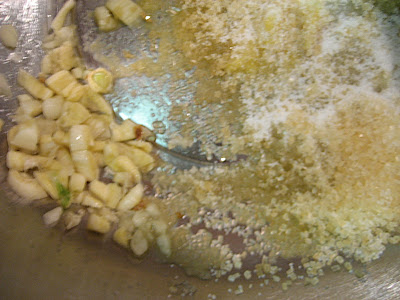
Now I chop the garlic and grate the ginger.  I freeze my ginger, so grating it on the Microplane (BEST KITCHEN TOOL EVAH!!!) is easy:

From 2009 05 26 Huli Huli Chicken I

Now we start to mix everything together: this is the ginger, garlic and sugar.

From 2009 05 26 Huli Huli Chicken I

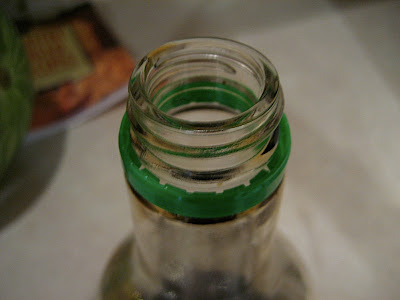
To pour 3/4 c. of soy sauce, I have to pry off the slow-pour spout thingy on my Kikkoman:

From 2009 05 26 Huli Huli Chicken I

That’s better:

From 2009 05 26 Huli Huli Chicken I

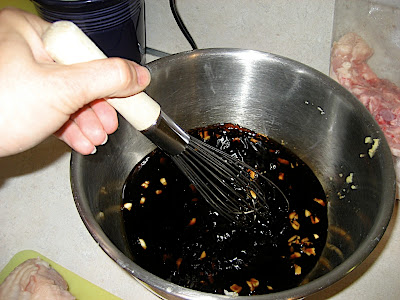
Now that we have everything — garlic, ginger, sugar, white wine and soy sauce (I omit the MSG), it’s time to stir stir stir. I try to dissolve as much of the sugar as I can.

From 2009 05 26 Huli Huli Chicken I

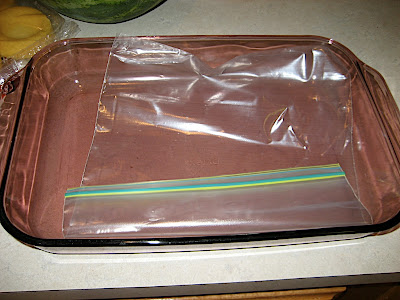
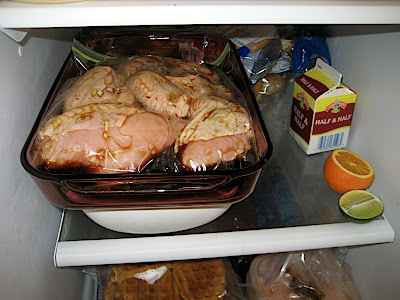
Now I take a 9 x 13 baking dish and line it with a gallon-sized zip-top bag:
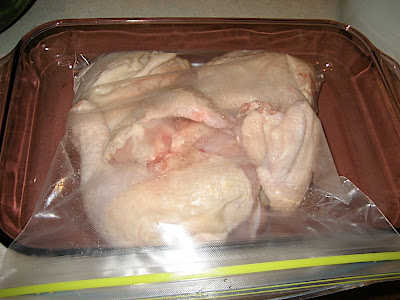
From 2009 05 26 Huli Huli Chicken I

Add the chicken:

From 2009 05 26 Huli Huli Chicken I

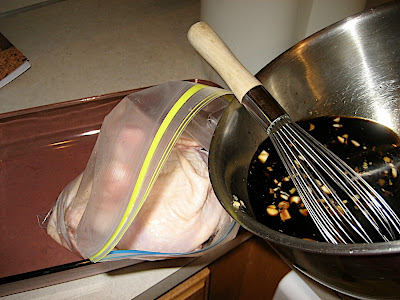
Pour in the marinade:

From 2009 05 26 Huli Huli Chicken I

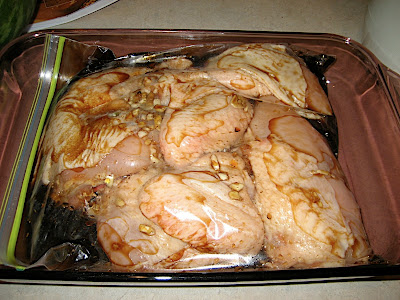
And here’s what you get:

From 2009 05 26 Huli Huli Chicken I

Since the chicken is taking up so much space in the bag, a little marinade will go a long way in the zip-top baggie. I will allow this to sit in my fridge for TWO DAYS, flipping the bag about every 12 hours.

From 2009 05 26 Huli Huli Chicken I

You’ll just have to come back Thursday night for the rest of this — I haven’t decided whether we’re going to grill or roast/broil this, it’ll depend on the weather. As much as I love how this tastes grilled, grilling bone-in chicken breasts is tricky. Balancing cooking the chicken through with keeping the marinated exterior from burning is always a challenge in the Vollmer house!

13. April 2018 · Comments Off on Spring Break 2018: Hawaii Day 2 Report · Categories: Uncategorized

For a Colorado family, hiking up Diamond Head was cake! I just wish it wasn’t so crowded.

Today was an active day. We awakened nice and early to take an Uber over to the Diamond Head State Park trailhead, arriving at around 8am. We easily took the trail up and back and enjoyed the views immensely, but didn’t enjoy the crowds or the incredible humidity: we were pretty soaked in sweat by the time we got back to the base area about an hour later.

More »

07. August 2011 · Comments Off on Dave’s Chicken and Shrimp Fried Rice · Categories: Uncategorized · Tags: ,

Dave enjoys cooking.  It’s an occasional indulgence for him — he has a suite of yummy recipes that he likes to call his own.

Sadly, he doesn’t cook as much as he says he’d like to, since on on most weekdays he’s coming in from work while I’ve been working on dinner for some time.

Since today is Saturday, tonight he took the time to make the family the fried rice recipe he enjoys making while I’m on reserve duty.  It’s really easy, and you’ll find it isn’t really a recipe, per se.  It’s more of a set of ingredients tossed together in a wok or large skillet.  It’s a great way to use leftovers!

The first thing Dave does is chop, chop, and chop some more.  Onions, carrots, and cooked chicken.  We had a couple Huli Huli chicken thighs leftover from earlier this week and these were chopped up.  I also cooked a couple more chicken breasts in the microwave, see below for more on that!

This is our version of a “Slap Chop”-type of food chopper.  It made chopping the 1/2 large onion, 1 c. of carrots and 3 cooked chicken breasts very very easy.

Onions.

Carrots.

Cooked chicken breast.  I learned a new trick to make preparing cooked chicken for recipes super-dooper easy…see the next caption.

Do you have one of these?  It’s Pampered Chef’s “Deep Covered Baker”.  I know it’s expensive, but all you have to do is host a Pampered Chef party and get it for free, like I did several years ago!  3 chicken breasts, 14 minutes in the microwave in this baker — who woulda thunk it?

Along with the chopped vegetables and chicken, also beat 2-3 eggs together, peel some raw shrimp and have 3 cups of cooked rice ready to go.  Heat up a wok or large skillet on “high”.  Add oil of your choice, we use sesame oil.

I love my Zojirushi rice cooker!  A gift from my parents about 8 years ago.  Hinode medium grain Calrose rice is our family’s rice of choice, we eat about 10 lb. every 6 weeks.

Fresh shrimp, caught off Jacksonville on Friday night, ready to cook on Saturday night, did I mention how much we love Florida???

Start by scrambling the eggs.  Remove the eggs to a dish when they’re finished.  They’ll be added in at the end:

Next you’ll add the onions, carrots, rice, chicken and some soy sauce to the wok, stir frying it, adding oil as needed to keep it from sticking to the pan.  With luck you’ll develop a nice crisp to the rice, which is oh-so-good!

At the end we tossed the shrimp, and then put a lid on the wok for about 5 minutes to let the shrimp cook.  It doesn’t take much heat, or a very long time at all.

Serve it with a glass of milk for a complete dinner.

Yikes, we almost ate it all up before I remembered to take a picture of the finished product!  Hence the small pile on the greasy plate with the fork in the background!
13. June 2011 · 2 comments · Categories: Uncategorized · Tags: , ,

I guess good recipes travel fast!  I was delightfully surprised when one of Brandie @ The Country Cook’s friends, Laurie @ Feeding My Ohana, contacted me about how excited she was to see a non-commercial simple Huli Huli Chicken marinade recipe at The Country Cook a couple weeks ago.  Laurie tried it and gave it a thumbs up!

Last Wednesday she featured the recipe, with a summary of my two blog posts from Memorial Day weekend 2009, on her blog.  She graciously omitted the chicken mutilation pictures, lol!  She added a key part to the recipe that I’d been forgetting about all these years: Shouting “HULI!” when you turn the chicken on the grill.

You can’t forget to do that!

01. June 2011 · 3 comments · Categories: Uncategorized · Tags: ,

My dear friend Brandie at The Country Cook has a surprise waiting for us this morning!  My first ever guest-blog-post!  The Country Cook is fun because each of Brandie’s recipes has a great story to go along.  I had the PERFECT recipe to add to her blog and was so excited to get to share it!

04. January 2010 · Comments Off on Harvesting the Poop! · Categories: Uncategorized · Tags: , , ,

Around Halloween, it got cold enough in our basement that I had to bring my worm bin upstairs to the living room. I keep my house pretty cool, but for the past 2 months my worms seem happy enough. We have been giving them about a pound of food scraps per week.

Other than giving them food, I sort of neglected giving them additional “bedding materials” since Thanksgiving, and today when I opened the bin to toss in some banana peels, I was greeted with an, um, odor. It wasn’t a horrible odor, but it was certainly different than what I had been smelling, which was just the smell of dirt.

I decided an emergency “worm castings harvest” was in order. I hadn’t done this yet, so I had to refer to a technique I had read several months ago. I attempted another popular technique of pushing the older, more processed castings to one side of the container, filling the empty side with clean bedding and fresh food. This didn’t seem to make a difference for the worms, many of them went to the clean side, but websites seemed to indicate a mass exodus from the “old side” and this simply wasn’t the case for me.

So here we go — I dumped out the contents of the bin and immediately tossed the newer bedding and food scraps back into the bin. The black tray there is the bottom of Howie’s crate from when he was a puppy. He no longer uses a crate.

From 2010 01 03 Worm Casting Harvest

Note the light on the right. This light is used to “scare” the worms into the center of the pile.

This project took me two hours — to slowly pick at the castings. The clumps of castings went into the buckets, while worms, food scraps and obvious areas of shredded paper went back into the bin.

From 2010 01 03 Worm Casting Harvest

From 2010 01 03 Worm Casting Harvest

From 2010 01 03 Worm Casting Harvest

By the way, yes, those are margarita mixer buckets you see there. Great for gardening jobs!

So…as you can see, the pile works down pretty nicely, with a bit of patience.

From 2010 01 03 Worm Casting Harvest

I guess now’s a good time to mention that my castings were chock full of cocoons that I was attempting to save as well.

From 2010 01 03 Worm Casting Harvest

A view of a hunk of casting with worms and cocoons.

From 2010 01 03 Worm Casting Harvest

Now for the cool part — as I pick away at the castings, the worms are continuing further and further into the center of the pile to avoid the light. But at a certain point, the pile becomes nothing but worms!

From 2010 01 03 Worm Casting Harvest

From 2010 01 03 Worm Casting Harvest

From 2010 01 03 Worm Casting Harvest

From 2010 01 03 Worm Casting Harvest

Then, it’s easy to pick up the clump of worms and toss them back into the bin:

From 2010 01 03 Worm Casting Harvest

From 2010 01 03 Worm Casting Harvest

Jacob won’t touch the worms, but Timmy enjoys checking them out!

From 2010 01 03 Worm Casting Harvest

I filled both of these buckets with castings, I’d guess about 10-12 lbs. total! There are still a number of baby worms in the buckets, ones that I couldn’t easily pick out of the castings…I don’t know if they’ll survive in the basement, either from the cold or from the lack of food scraps. For now the buckets are simply in a giant Ziploc bag in the basement. It had been on my mind to toss the castings into my garden plot immediately (after all, wasn’t that the point of all this effort?), but it’s currently under about a foot of snow.

From 2010 01 03 Worm Casting Harvest

There you have it! I’ve successfully harvest castings from my worms! I’m so excited about that.

However, I’m not sure I like the two-hour-long pick-fest with the castings. I’m eyeing this apparatus for future use.