22. July 2009 · Comments Off on Pumpkin and Hops Updates · Categories: Uncategorized · Tags: , , , ,

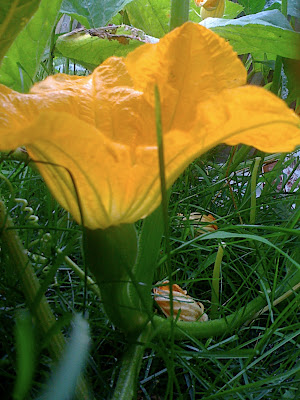
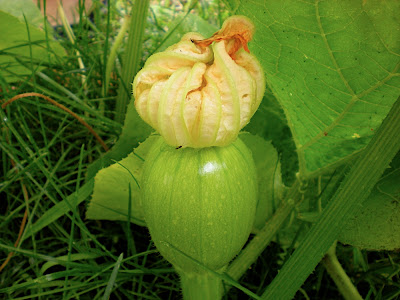
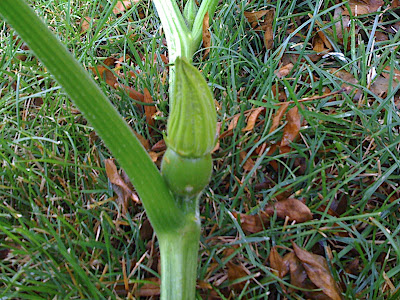
First of all, a week after the artificial insemination, here’s what we have for a pumpkin so far:
This is about 1.5 lbs. and about 10″ circumference. I’m so excited at this!

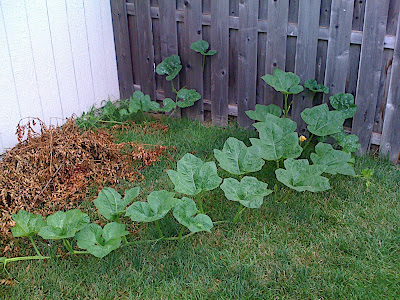
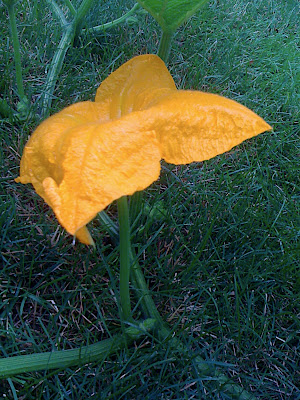
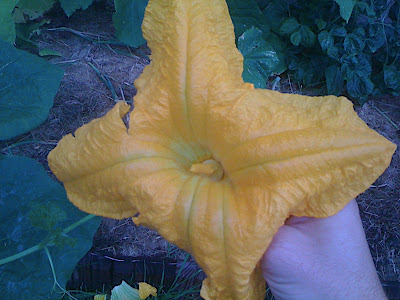
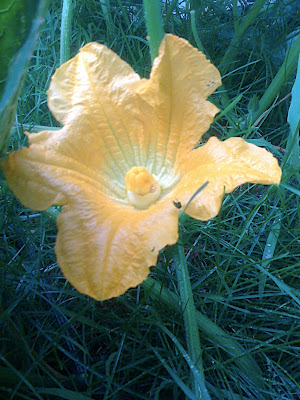
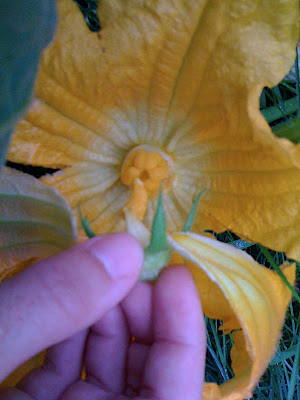
Unfortunately, the next several female flowers haven’t been opening up, but they can be really sensitive to amounts of water it receives. There are 4-5 more buds pending, and I’m keeping tabs on it…

Someone on Facebook commented about the breed of pumpkin he was growing, and it wasn’t till then I realized I don’t know what breed this pumpkin is going to be. It could be a pie pumpkin, a jack ‘o lantern pumpkin, or maybe one of those state fair pumpkins?

We’ll all just have to wait and see….

Break break.

I’m not sure whether I’d mentioned it on my blog, but we are also growing hops in our backyard. We ordered some rhizomes this past spring from American Brewmaster, the store that Dave frequented for his beer-making supplies while we were living in NC. After consulting billions of websites (here’s one) looking for how hops are grown, we learned that Nebraska is at the ideal latitude for growing them, and if the soil is good, and they’re planted in the right place, we could get enough hops to nicely augment Dave’s homebrewing.

So Dave ordered two rhizomes of Centennial hops this past March (at $4 per rhizome, this seems a much better deal than $4 per ounce for hops cones themselves!), and we potted them in pots in April to give them a head start. This is from April 9th.
The first week of May, Dave rigged up the trellising and we put the hops in the ground!
There was little progress for a month or so, Dave and I got a bit worried. By Memorial Day, nothing was climbing…

Picture from May 26th.
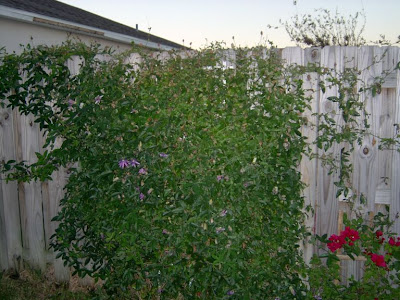
Just before our vacation, we saw evidence of some real climbing, and by the time we got back from our vacation, the vines had reached the tops of the trellises! From June 29th.
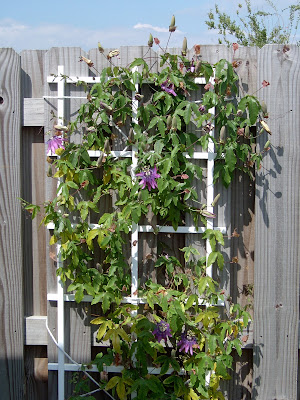
Just after July 4th, flowers started to appear up at the topmost parts of the vines, and I’ve been having a pretty hard time getting good pictures of them…here’s what I got today (July 21):

We weren’t expecting flowers this year. Hops are perennial vines that usually use its first-year growth to focus on strengthening its root system and establishing itself. But whatever we get will be great, and can be preserved for future brews. We’re just starting to see the flowers, flowering is allegedly going to continue through late August/early September, so I foresee plenty for at least one batch for Dave and his friends to enjoy this fall/winter.

After all, the world is just coming off of a hops shortage, and the homebrewers takes the brunt of such shortages….

Cheers and happy gardening!

17. July 2009 · 2 comments · Categories: Uncategorized · Tags: , ,

I consider this a success:

Before:

From 2009 07 14 Pumpkin Pollination

After:

From 2009 07 14 Pumpkin Pollination

If the pollination hadn’t “taken”, the bulb behind the flower would have yellowed and fallen off the vine by now. This was about 52 hours after the pollination, and the bulb has at least doubled in size.

I’ll keep you updated on the progress on our pumpkin!

14. July 2009 · 18 comments · Categories: Uncategorized · Tags: , ,

I have this incredibly HUGE pumpkin plant taking over my backyard…

From 2009 07 14 Pumpkin Pollination

And that’s just the part of the one plant that’s come through the fence and is actually bleeding into the front yard!

Anyway, I’ve grown pumpkins in the past and the best I traditionally do is 1…at most 2…pumpkins! This time around, I’m going to try my hand at (drumroll please!) hand-pollination!

I’d read that those enormous pumpkins you see winning blue ribbons at county fairs are typically hand-pollinated. And those who are super-serious will even use plastic bags to ensure the male and female flowers keep as much of their pollen on hand as possible!

How does this work? Well, for those who didn’t realize, plants in the squash family — to include cucumbers and pumpkins — have both “male” and “female” flowers on the same plant. Male flowers are typically bigger and are on a longer stem, while female flowers will have a bulbous piece just behind the flower…which is what eventually becomes the squash itself when pollinated. On a pumpkin, the first you’d see male flowers — LOTS of male flowers — and then after several weeks (at least 4 weeks in my case), you will see female flowers appear. I’ve had less than 6 so far.

Here’s a male flower. Note the thinner stem and the stamen in the center:

From 2009 07 14 Pumpkin Pollination

And the female flower. The bulb behind the flower and the multiple “stigma”…with an opening in the center for? You guessed it — the male flower’s pollen!

From 2009 07 14 Pumpkin Pollination

So here’s the deal. You have to do this early enough in the morning that the flowers are all still open. Most pumpkin flowers will shrivel up by mid-day, especially on warm days. You pick a male flower off its stem, and pluck off the petals, exposing its “manliness”:

From 2009 07 14 Pumpkin Pollination

Then you rub the male and female innards together…this is rated NC-17, sorry!

From 2009 07 14 Pumpkin Pollination

Now…some folks who have tried that have reported that you’ll see evidence of success in as few as 12 hours — the bulb will begin growing. In an unsuccessful pollination, the flower would fall off and the bulb will turn yellow and shrivel off the flower.

I’ll check tomorrow morning for evidence of success/failure of today’s pollination. There should be another flower ready to attempt tomorrow.

06. July 2009 · 6 comments · Categories: Uncategorized · Tags: ,

As most people know, Nebraska is more or less rolling prarielands, with very very few trees.

The part of Nebraska we’re in has more terrain to it, and it also has some nice wooded areas. Particularly along the Platte and Missouri Rivers. We live about 5 miles north of the Platte, and I guess about 5 miles west of the Missouri, too. Cool.

Anyhoo, we are fortunate to have 3 very tall trees in our backyard. Most of the houses in our neighborhood have a couple tall trees, in fact. We have two honey locust trees on the right, in this picture. The leftmost tree is a white mulberry (I think).

From 2009 06 30 StupidMulberries

We have had many issues with the two locust trees, most recently a night of thunderstorms had us waking up to this large branch dangling:

From 2009 07 04 LocustBranchWindDamage

Yesterday I trimmed the bottom of the branch, to get the leaves off the ground, and we’ll call our property manager to take care of the rest of it this week.

But this post is about what a pain in the rear the mulberry tree has been. We moved into this house on August 1st of last year. I guess we were at the tail end of the mulberry dropping season, there was a little bit of mess, but not a ton. When we got back from our vacation last weekend, our back patio was pock-marked in mulberry stains:

From 2009 06 30 StupidMulberries

We love our backyard. The kids have a cool swingset, they have a flat place to play soccer, Star Wars, fetch with Howie, etc. But lately it’s been a pain because they’re tracking in the mulberry ooze, bringing the deep purple juice all through the house, all over the carpets. Dave has been powerwashing our patio every couple days. Here’s the bottom of my running shoe:

From 2009 06 30 StupidMulberries

So now the kids have strict orders to remove their shoes the second they come inside. Usually not a difficult thing, but Saturday night Jacob ran in looking for one of his Nerf guns and didn’t remove his shoes first: a fresh mulberry on the bottom of his shoe left perfect little circular prints all over our family room, stairs and living room as Jacob was searching for his toy.

As for Howie, we have to make him sit as soon as he comes inside, and then take a wet paper towel to wipe his paws. I shampooed the carpets last week, which Howie really enjoyed — really, he seems to like the smell of the Rug Doctor shampoo.

There’s very little else we can do — we’ll just have to keep our grill covered, our patio furniture covered and tend to avoid that part of the backyard until mid-August. Boo.

27. February 2009 · 6 comments · Categories: Uncategorized · Tags: , , , ,

I’ve been getting a number of care packages from my family and friends. Dave and the boys, my in-laws, Paul’s family and Wendy’s family have all sent goodies and they’ve all been awesome. The snacks, books, magazines and drink mixes have been greatly appreciated!

This post today is about one particular…unusual…item I received at the end of January.

A Chia Pet.

And not just any Chia Pet:

From 2009 01 31 ChiaHomer

How cool is this? It came from Paul and his family and I was very excited to get it. Folks who work near me who saw me unwrap it agree: it’s a cool gift! Paul and his wife Louise must have been sympathetic after reading how excited I was about a pathetic little patch of foliage — the first I had seen after several days here.

I’d given Dave a Chia Homer before, 2-3 Christmases ago. I remember the issues we had keeping his head completely filled with water, the very top of the head is higher than the water outlet, so the very top of the head never gets any water and therefore doesn’t grow.

Sounds like a challenge to me!

So here we go! I started this project in Feb 1st, so you’ll see 4 weeks worth of growth! It’s like one of my traditional craft blog posts! Fun fun fun!

First things first: GO SOAK YOUR HEAD! As is always the case with terra cotta, a good soaking will help the pot retain moisture.

From 2009 01 31 ChiaHomer

I had difficulty finding a container to use, but with some ingenuity, I come up with this:

From 2009 01 31 ChiaHomer

See how nicely Homer fits inside?

From 2009 01 31 ChiaHomer

Next, we start the seed mixture soaking. Chia puts the seed in some sort of stuff so that when you soak it, it becomes a gel that will adhere to the terra cotta easier.

From 2009 01 31 ChiaHomer

From 2009 01 31 ChiaHomer

…and you let that stuff soak for a “few” hours. I had instructions that said “overnight” and the seed packet said “1 hour”. So I went middle-of-the-road and let it soak for the duration of my weather shift, probably about 9 hours.

So now spread the seed gel stuff over Homer’s head:

From 2009 01 31 ChiaHomer

And there you have it — Homer’s Gellin’ (2 Feb):

From 2009 01 31 ChiaHomer

Now enjoy some time-lapse photos of Homer’s growth, starting with 4 Feb:

From 2009 01 31 ChiaHomer

6 Feb:

From 2009 01 31 ChiaHomer

8 Feb — yeah I started remembering to rotate him after seeing this directional growth:

From 2009 01 31 ChiaHomer

9 Feb (do you sense a lack of lighting?):

From 2009 01 31 ChiaHomer

Let me pause here and address the lighting issue. You see, Homer is a thirsty son-of-a-gun. I was giving him some 4 oz. of water per day, so I needed to keep him in plain sight so I can remember to water him. Unfortunately, I work overnight, so Homer spent time in a flourscent-lit room while I work, and I kept the room dark during the day while I sleep.

It was at about this point that I told myself “Forget that!” and moved him to the windowsill on the OTHER SIDE of my light-blocking curtain.

The point of this picture below is to show how sparse the growth is on the top of the head. As mentioned earlier, Homer is thirsty, so the seeds at the very top seldom were watered, it was very difficult to keep the water levels that high.

From 2009 01 31 ChiaHomer

13 Feb — looking a bit like Don King:

From 2009 01 31 ChiaHomer

After moving to the window, Homer started doing MUCH better. Unfortunately, I can’t enjoy him the same since he remains on the other side of the curtain from me.

27 Feb:

From 2009 01 31 ChiaHomer

Showing the root growth down the back of Homer’s neck!:

From 2009 01 31 ChiaHomer

So now what? With all the growth, it’s now more difficult to keep Homer watered. He’s consuming 6+ oz. of water every 24 hours, in part from evaporation through the terra cotta, in part from what the foliage requires.

I’m probably going to scrub down Homer and start again for the month of March, this time taking better advantage of the sunlight on the other side of the curtain earlier in the process.

That should leave enough seed for Paul to generate his own oxygen source once he gets here in the next few weeks.

15. January 2009 · Comments Off on Let There Be Life! · Categories: Uncategorized · Tags: , ,

It wasn’t until yesterday (5 days into my deployment) that I found signs of life other than us humans. I still haven’t seen any animals, other than a security forces German shepherd. I hear there’s a cat that lives among us at the facility I work at, but I haven’t seen him yet.

I was walking to the new fitness center on the base (I live next to the old one) and came across this patch of flora. Enjoy!

22. January 2008 · 1 comment · Categories: Uncategorized · Tags: ,

In this cold weather, I was thinking fondly about the butterfly garden I had planted in my backyard in Florida. I planted most of the stuff in July 2003, after my summer veggie crop croaked from either baking to death in the hot FL sun or rotting to death from torrential FL rains.

But these plants flourished all winter long and by spring 2004, we had several species visiting us. I’d run outside with my HP Photosmart and go snap-happy. This was a great camera for outdoor 16x zoom.

One of my neighbors, who was homeschooling her kids, brought her 9-year-old son over to observe the life cycles in fall 2004. A great science lesson! I wish Jacob was a little older so he could appreciate them more — he enjoyed naming several of the caterpillars after his Thomas and Friends engines!

From 2003 10 13 Bu…

This is a white peacock butterfly on a butterfly bush.

From 2003 10 13 Bu…

Gulf Fritillary on a pink lantana.

From 2003 10 13 Bu…

Monarch on a milkweed.

From 2003 10 13 Bu…

Black Swallowtail caterpillar on a dill plant.

From 2003 10 13 Bu…

Black Swallowtail on parsley.

From 2003 10 13 Bu…

Very young black swallowtail larva on flatleaf parsley. Darwin at work — it looks like bird poop, doesn’t it?

From 2003 10 13 Bu…

Monarch caterpillar on a milkweed. Darwin at work again: the larva’s mouth is on the right side in this picture, but the long antennae-looking appendages on the left are meant to trick predators.

From 2003 10 13 Bu…

Gulf fritillary caterpillar feasting on my purple passion vine.

From 2003 10 13 Bu…

This is the entire passion vine plant that the Gulf Fritillary caterpillars were eating. I think this was taken on December 14, 2004…the sun would only directly hit the right side of the vines, so that’s where the caterpillars would congregate. Consequently, the right side of the plant looks less lush than the right — it got devoured on the right side!

From 2003 10 13 Bu…

By the way, this is the same plant from October 13, 2003. It was about a foot tall when planted in July 2003.