09. May 2011 · Comments Off on Mother’s Day 2011…Or "What Your Kids Really Think About You" · Categories: Uncategorized · Tags: , , ,

Hopefully the Moms reading this had a nice Mother’s Day.  I enjoyed a nice day with my boys.  I’ve cracked the code for happy kids: a trip to the beach!  They were happy, I was happy watching (and catching a few waves with a Boogie Board!), all was well with the world.

The boys each brought home really cute Mother’s Day gifts from school on Friday.  I’m such a sucker for handprint art from my kids!

Timmy asked me to turn his Mother’s Day card to me into a Handprint Identification Panel for his room. So that only he could enter/exit, and not his brother. Okay, why not?  What else was I going to do with a Mother’s Day gift from my son?

That’s my handprint on the right, so I could access Timmy’s room to empty his trashcans and take care of his laundry.  Otherwise he would have been on his own for those chores 🙂

Each boy also brought home these question and answer sheets. They filled in the blanks answering questions about Mom.

I won’t show the whole thing — since it has things like my age and my favorite colors. You guys don’t need to know all that.  But here’s a sliver of each boys’ assignment, which is a glimpse into what they think about me.

An excerpt from Jacob’s assignment.  The first question and answer absolutely melted my heart.  The second one…well…I guess it’s a sign that perhaps I need to get off the grid a little more often.

From Timmy’s assignment.  If you can’t quite decipher it, it reads “She likes to clean and shop.”  I guess I’m glad Timmy thinks I like to clean.  Not sure I want him thinking I don’t like cleaning…even though I don’t care for cleaning that much.  A necessary evil.

The other questions and answers were all very nice.  Jacob’s answer certainly has me assessing the laptop fused to my lap, and whether it’s time to back off a little.  I think so.

So if you see less of me online, this is probably why…

09. May 2011 · Comments Off on Hiking Stick Project… · Categories: Uncategorized · Tags: , , ,

When we were in South Dakota last May, the boys picked up branches to use as hiking sticks.  There was ponderosa pine all over the place, and it wasn’t hard for the boys to find something in their sizes.

The boys begged to bring home the sticks as “souvenirs” from their trip.  How could I say “No” to such a cute idea for a souvenir???  Dave and I had promised for months to “finish” the sticks and make them more permanent: sand them down and coat them with some polyurethane.

We even took the sticks with us to Colorado last August for hiking at Rocky Mountain National Park!

11 1/2 months later, I finally finished this project.  A camping trip to the Green Mountains next month inspired me to get this done.  It was only the cost of the polyurethane and sandpaper.  I fear they might outgrow these pretty quickly though.

YES, we moved the sticks from Nebraska to here.

The sticks last week as I retrieved them from the umbrella bin where they’d been stored since we moved here.
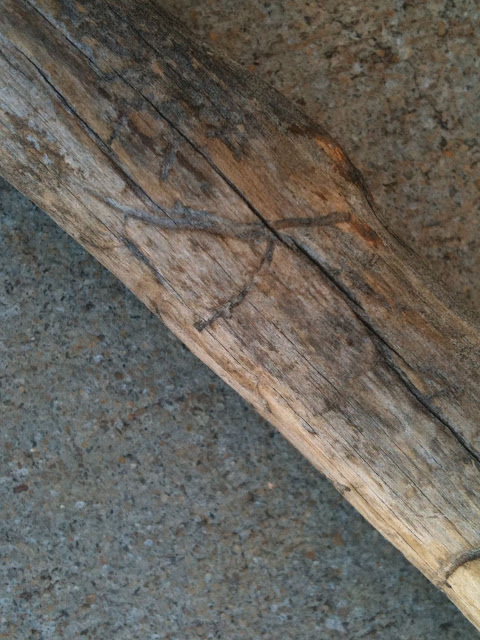
There’s termite or carpenter ant detail in Jacob’s stick.  I’m pretty certain the bugs aren’t there now, but the detail gives some character 🙂
I used some 220 grit sandpaper to sand it all down.
I had to break out a Gerber tool to whittle off the remaining bark.
I then used a foam brush to apply 4 coats of Minwax polyurethane.
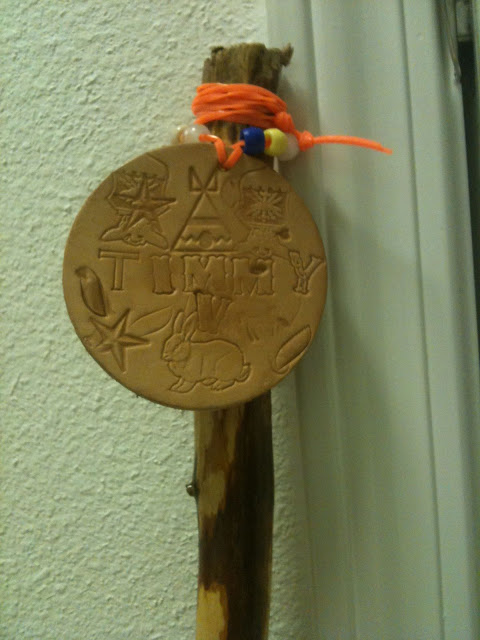
The finished products.  Complete with Scouting medallions on J’s, and leather tags on both J’s and T’s.

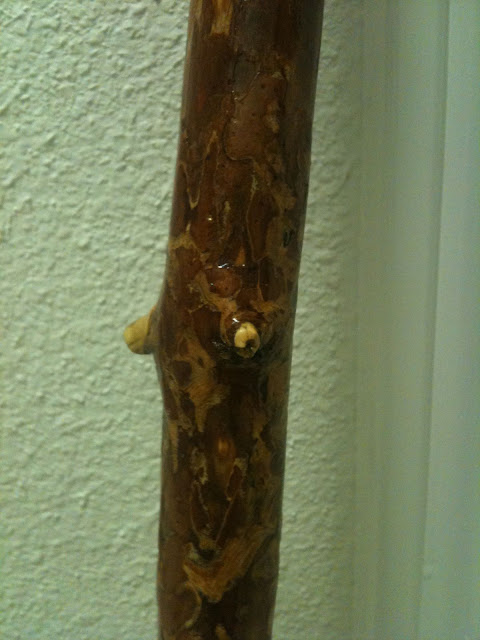
Love the detail here!

I’ll add on some pictures of the boys with these later this week.  I finished this after their bedtime tonight, and I don’t have my good camera (still with Dave on his railfanning trip).  Stay tuned!

12. April 2011 · Comments Off on Canning 101: Or "Jam Tomorrow, Jam Yesterday, But Never Ever Jam Today!" · Categories: Uncategorized · Tags: , ,

* Name that tune!

Oh, never mind!  Here’s the whole song, just for you!  This Carol Channing act sent my sister and me into a flurry of giggle when we were little.  Prepared to have it stuck in your head for a while, ha ha!

With all those strawberries I brought home on Monday, I had to get cracking to make some of the freshest strawberry jam EVER!  For the first time since 2007, I dug out my canning supplies.

“As if you don’t do enough…you do canning?”

YES!  I remember my Mom doing it when I was a kid, and it turns out canning your own food is easy, inexpensive, and incredibly nutritious!  It’s great knowing what’s in your food!

I bought my hardware in summer 2001 when we grew so many tomatoes, I was able to preserve several jars of whole tomatoes, along with several jars of homemade pasta sauce.  I’ve used it off and on in Ohio, Florida (2002-2005) and North Carolina, but then the equipment sat dormant while we were in Nebraska.

How does canning work?

Like everything else I blog about, a little science/history lesson is in order.  According to the authority on everything, Wikipedia, home canning is the process of preserving foods by putting them in jars and heating them to kill organisms that might cause the food to spoil.  I mainly stick to the easy-to-preserve foods (strawberries and tomatoes), and I’m now comfortable enough with the process that I’d like to delve into the more challenging foods soon, such as corn and peppers.

When foods have a pH of lower than 4.6, you can effectively kill the microorganisms by simply boiling the food at 212 degrees F for a specified period of time.  This is why preserving tomatoes, berries, and pickles is so easy.  And the hardware is inexpensive.

On the other hand, if you’re interested in preserving meats or low acid vegetables (such as corn and non-pickled peppers), you need to boil the food at a HIGHER temperature than is possible by simply boiling.  Perhaps you’re wondering, “How is this possible?”  Easy: you need a pressure cooker!  A pressure cooker, which allows the air pressure inside the vessel to increase as you heat it, the boiling point of the liquid can increase over 250 degrees F!  WOW, how cool is that?  Now, you can boil the canned foods at a high enough temperature to kill even the Clostridium botulinum spores, which can’t live in temperatures higher than 240 degrees!

As I’ll discuss in the next section, venturing into the pressure canning world involves a more lofty investment in a quality pressure cooker, large enough to hold the jars.

What kind of equipment do I need?  And how much will this cost me?

If nothing else right now, get this book!  Or at least a version of this book, since it’s constantly being updated.  This is the one I have from 1999.  It offers easy guidance on what equipment you need, along with dozens of canning recipes — not just for the minimally prepared foods, but also for salsas, sauces, and assorted flavors of pickles.

The rest of the supplies can easily be found at your local Walmart.  Look in the kitchenwares section…sometimes it’ll be moved to a “seasonal” section when the tomatoes and other veggies are in full harvest.  You might or might not see the supplies at other discount department stores — in this area it’s been hit or miss at my local Target (they had salsa jars, which was cool, but that was it).

This is a “canner”.  Really…it’s just a really big pot.  If you have a large soup pot, it will do the same thing for you: hold boiling water.

This “canner” includes a nifty rack that helps you easily lift all the jars out of the pot at once.  This will hold seven jars.

I also got this “accessory pack”.  Over the years, I’ve come to only use the tongs and the funnel.  And honestly, I don’t even use the tongs all the time.  But the funnel is a lifesaver — and can be purchased separately for just $1-2!

$6.97 at your local discount department store.
My 11-year-old accessory set.

Jars, Lids and Bands.  For me this is the only recurring expense with canning…this is because I give away so many of my jams.  I lean towards the “quilted jelly jars”, which are half-pint (8 oz.) sizes, for jams and jellies.  You can get a dozen for about $9-10 at your local discount department store.  For my tomato products I look for the “wide mouth” quart-sized jars.  They take special lids and bands, but aren’t that hard to find.

Some terminology.  The “lid” is the solid round disc with the rubber gasket on the bottom.  The “band” is the threaded ring that really is only needed to hold the lid in place until it’s been vacuum sealed.  Some folks will remove the band before storage, but I prefer to keep it with the jar, helps to hold the unsealed lid on the jar when you’re storing it in the fridge.

Know that if you keep your jars, you can reuse them with the bands, and you simply need to buy new lids for $1-2 per dozen.

These lids have a special rubberized gasket that will form the seal on your jars.  They can only be used once, but the jars and bands can be used multiple times.

And finally, you’ll need the fruits or vegetables you’re planning to preserve.  If you’re making jam or jelly, you’ll want to buy some pectin, which is also found with the canning supplies at your local discount department store.  Pectin is a type of polysaccharide found in plants.  This is the ingredient that gels together jams and jellies, and is also found in natural intestinal remedies, such as fiber laxatives and stool softeners.

So let’s tally up the expenses for canning your own food:

  1. “Canner” or other large pot: $20
  2. Accessories: $7
  3. Jars, Lids, Bands: $10 per dozen
  4. Pectin: $1-2 per recipe’s worth
  5. The cost of whatever food you’re planning to preserve.
I’d say that for about $50 of up front cost, the cost of my family going out to dinner at Outback Steakhouse, you could lay the foundation for preserving foods with little-to-no chemicals.
OR: You could just hit this “Easy Button” here, which will hook you up for less than $45!

Canning 101: Classic Strawberry Jam

So imagine tapping into some fresh fruit or vegetables that were preserved a mere SIX hours after picking them off the plant!  And that you know EXACTLY what’s in the jar.

In this case, I know that this strawberry jam has only strawberries, sugar and pectin.  Of course, this recipe I’m going to demonstrate has 7 cups of sugar in the 9 half-pints of jam, so it’s definitely NOT a low-calorie food.  I’m only attesting that it’s nice to know exactly what’s in the jar.

(Two days later I made jam with half the sugar — which required a different kind of pectin that promotes more gelling — but I haven’t tasted it).

So here we go.  Let’s start with our stash of strawberries.

No…wait.  Start with the canner pot, make sure it’s filled up about 2/3 full with water and get it boiling.  It’s a large pot and you won’t want to wait for that water to boil once the jars are ready to process.

Back to the berries.  Crush the berries. I have a potato masher with which I can do this.  Looks like serious strawberry carnage here, doesn’t it?
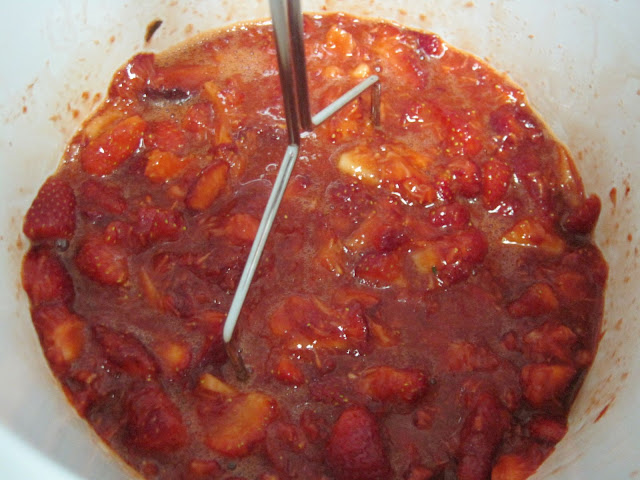
Put the pot on high heat and bring to a boil. If you’re using traditional pectin, just put in the contents of the box with the sugar called for in the recipe. In this recipe, it’s asking for SEVEN cups of sugar (oofta!). If you’re using “low sugar” or “sugar free” pectin, read the instructions about the possible additional ingredients to be added at this point.

Allow this to boil vigorously for the amount of time in the instructions. In this case, we boiled for about 5 minutes, and this allowed the pectin to gel. You might want to use this time to get your ladle, funnel, clean jars, bands and lids ready near the pot.
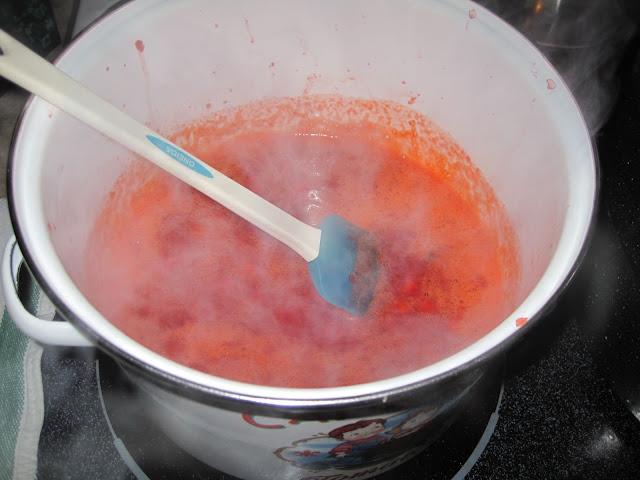
You need to work quickly at this point. Fill each jar with the jam to within 1/4-1/2″ of the top of the jar. DO NOT FILL TO THE VERY TOP! You need the space to account for possible expansion of the jam while you’re boiling the jars, as explained in this link.

Make sure the top edge is clean, then place a lid on top.
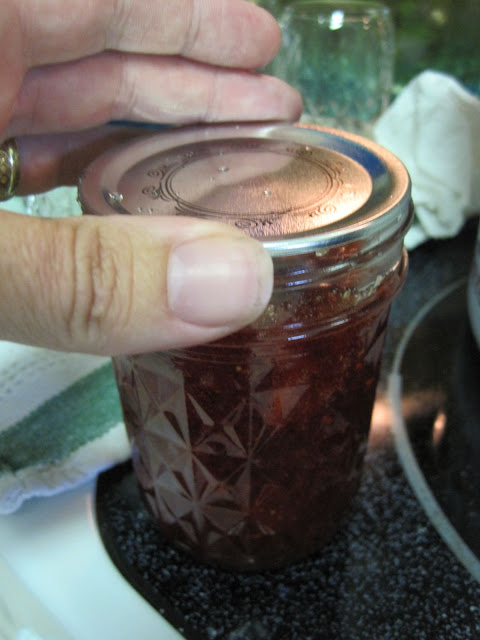
Follow it with a band, which doesn’t need to be closed super-tightly. Just tight enough that the lid won’t slide off. That tightness will loosen up while you’re processing the jars.
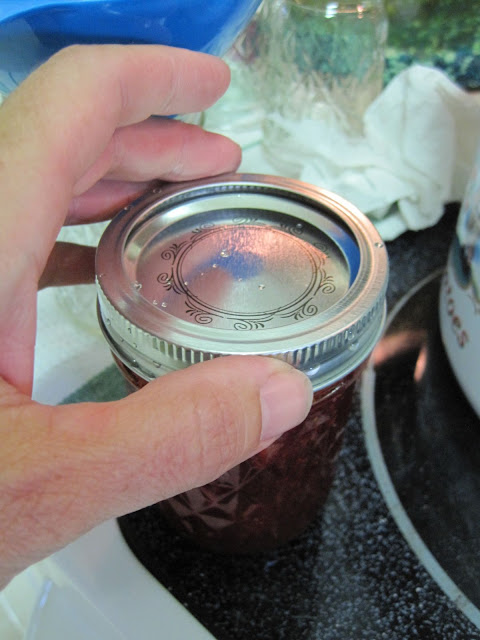
Now it’s time to get the jars into the canner, whose water should be boiling already.  I use a rack that makes it easy to lower/raise up to 7 jars.
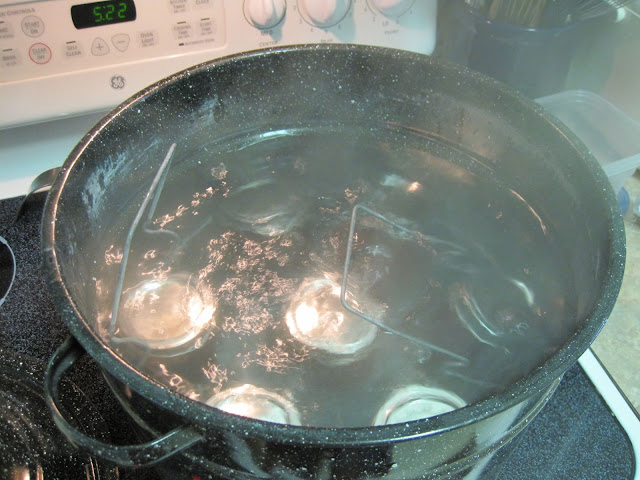
After the requisite number of minutes of boiling (15 minutes in the case of the strawberry jam), pull out the jars and let them dry off/cool on a towel. Listen for the pop — that’s the sound of the lid “imploding”. You want to hear this pop once for each of the jars you have, it’s the proof that a vacuum seal was indeed formed and your jams are good to go for up to 12 months in the cupboard!

If you don’t hear the pop, and there’s still a flexing of the lid when you press down on it, then your jam isn’t sealed. In most cases, you can simply re-boil the jar again and try for that seal. If that doesn’t work, then pop it in the fridge where it’ll last you 7-10 days.

The finished product. Some might suggest you cool the jars upside-down, to help the berries distribute better throughout the jar. I didn’t do that here, so the berries sorta drifted up towards the top.

Recipes claim that you should let the jars sit for 24 hours before using, but I don’t see why. Warm jam on some toast (in this case, potato bread toast)! YUM!

14. February 2011 · 2 comments · Categories: Uncategorized · Tags: , , ,

Happy Valentine’s Day friends!

We enjoyed a special Valentine’s Day-themed Build and Grow project at Lowe’s last Saturday!

My boys awakened this morning and were greeted with these little gifts for Valentine’s Day:

They had asked for them for Christmas, but I’m glad we waited till now, I think that Valentine Puppy sure is cute!

I’d backed off significant gifts for Valentine’s Day over the past couple years, but I’d kept these Pillow Pets in the back of my mind this year.  They’re about $20 each.

I found the Valentine’s ones at Walgreen’s.  You wouldn’t think of it, but you can whip together a pretty nice Valentine’s Day experience at your local drugstore.

I also found some M&Ms Star Wars gifts…$5 per kid.  The lightsaber on the left in the bottom pic has LED lights, you press a button and it stays on for about a minute.  More M&Ms stuffed into the handle of that toy.

11. January 2011 · Comments Off on Shameless Pitch #576: Build and Grow Workshops at Lowe’s · Categories: Uncategorized · Tags: ,

Jacob has to complete a number of achievements to earn his “Wolf Badge” for Cub Scouts. Those with scouts know exactly what I mean here…and those who don’t have scouts, well, these are tasks associated with being healthy, honest, righteous, and all around good citizens.

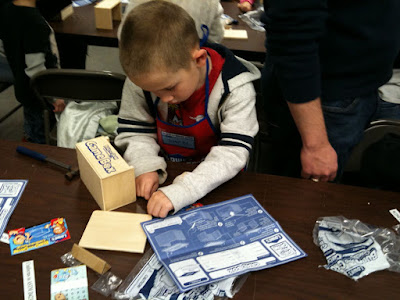
One of the achievement sub-tasks is to build a birdhouse or something similarly useful, after learning about tools for building. I got a tip from another parent in Jacob’s new Cub Scout den about simply showing up at a “Build and Grow” workshop at Lowe’s one Saturday morning. They’re usually offered twice per month, on Saturday mornings. Lowe’s provides the kits, loaner tools and workspace free of charge! You receive an apron to keep (and allegedly safety goggles too but my boys didn’t get those), and a patch to add to the apron after finishing each task.

You can sign up online to guarantee a kit being available, but the workshops are first-come, first-serve with the kits that are left if you just want to take your kids without committing one way or another. It’s recommended for kids in elementary school (although I saw many preschoolers getting in on the action).  We were there about 1/2 hour, and the environment was very laid back.  As soon as you arrive (after signing a waiver, tee hee) you get a kit and get to work.  The employees are there to help only if you need it.

The website will show what the kits will be for the next two workshops. So if you click on the link between now and about January 22, you’ll see a beanbag toss board and a music box (as a Valentine’s Day gift) as the next two projects. I happen to know that the February 26th project will be a wooden replica Lowe’s NASCAR car — such as the one pictured in the cartoon above, complete with a pull-back mechanism, I guess to celebrate the start of the 2011 NASCAR season.

I’m thrilled that my boys are old enough to enjoy this program — and we’ll be sure to keep it in mind as a Saturday morning free activity!  Enjoy some quick pictures I took of our fun morning!

From
From 2011 01 08 Build and Grow at Lowe’s

From 2011 01 08 Build and Grow at Lowe’s
Proud Papa!
From 2011 01 08 Build and Grow at Lowe’s
The boys received aprons, certificates and patches for completing this project.
From 2011 01 08 Build and Grow at Lowe’s
The completed “Game Box”.  Great first project!
From 2011 01 08 Build and Grow at Lowe’s
06. September 2010 · Comments Off on Timmy’s Flower Pot — Repurposed! · Categories: Uncategorized · Tags: ,

To follow up on yesterday’s panicked posting…

I went to the Apple Store today and came out of there with a new replacement iPhone. Apple has a program where wet iPhones can be replaced for $199. This is FAR cheaper than walking into the store in the middle of a two-year contract and buying a new phone: $500.

But far more expensive than if I hadn’t dropped the phone into the toilet to begin with.

Anyway, to get on with my life and put this sadness behind me…

Timmy came across an empty flower pot in our garage, where I’ve stored all of our flowerpots. It was one that he made for me at preschool in 2009 for Mother’s Day. It had a potted petunia in it. Once the petunia finished up for the season, I put away the flowerpot.

This upset Timmy. He asked this week “Can we buy some more flowers to plant in it?”

I told him “No”, but I did have a good idea…

You’ve all seen them at the doctor’s office or anywhere else where you’re having to sign paperwork and they’re attempting for you to not steal pens. The flower pot full of pens.

So that’s what I did this morning. I ran over to Michael’s and picked up a few fall-inspired flowers and some floral binding tape. I had everything else I needed in the house: the pot, the beans as filler for the pot, and plenty of pens and pencils.

I whipped this together in under 10 minutes. Cute, isn’t it?

From 2010 09 06 Timmy’s Flower Pot

And here’s the back:

From 2010 09 06 Timmy’s Flower Pot

Timmy was thrilled to see this come to life, and is happy his flowerpot is now a centerpiece at the kitchen table. And maybe now I won’t leave a trail of pens and pencils all over the house.

Although I have to say…the floral binding tape leaves a sticky residue that I hope goes away over time…

02. September 2010 · Comments Off on A Thomas-Themed Scrapbook. Really? Yes, really. · Categories: Uncategorized · Tags: , ,

How crazy are we?  My next scrapbook project is to use this lovely Thomas-the-Tank-Engine-themed scrapbook I got many years ago as a gift (I honestly don’t remember where/when I got it).  I opened it up recently after several years of it sitting with my other unused scrapbooks…and counted TWENTY available pages.

Could I possibly come up with 20 pages of Thomas?

To quote our favorite former Alaska governor: “You Betcha!” (insert wink and thumbs-up here)

We’ve been to enough Thomas-themed events, had enough Thomas-themed birthday parties, and gotten enough Thomas-themed toys to make a fun 20-page scrapbook.  Over the years I’d slowly accumulated Thomas-themed decorative papers, stickers and die-cuts.  I’d also accumulated generic-train-themed items.  It was time to put them to use!  My boys have attended Thomas events every year since 2003!  I also have plenty of pictures of Thomas birthday cakes (3 of them), Thomas toys, and a photo collection of the Thomas-themed clothing they have…to include Grandma Fox’s homemade pants and the Vans-style slip-on shoes she got in Hong Kong.

Yesterday I chose about 100 pictures from my photo files and sent them over to Walgreen’s for developing.  I knocked out 6 pages and it was so much fun going down memory lane!  I predict that my boys won’t be wanting to do this for much longer — Jacob already has outgrown Thomas and sticks to “prototype” toy trains.  Timmy still is enthralled with the magic of Thomas, and lucky for us, we found a TINY little narrow gauge tourist railroad in Alabama that hosts the event in the springtime if Timmy’s still interested.

Here’s the cover of the book — it’s a cool 3-D chipboard Thomas.

From 2010 09 01 Thomas Train Scrapbook

And here are the pages so far.  4 years, 4 different venues.  The next page I’m doing is from 2007, not a Thomas train ride, but our trip to “Thomas Live!” in Raleigh:

This is my favorite Thomas picture!  I believe this was 2006, based on Timmy’s shoe’s.
From 2010 09 01 Thomas Train Scrapbook
2003. The 3 pics on the left are our attempts to get J to look at the camera!
From 2010 09 01 Thomas Train Scrapbook
Trying out my new “Toy Train” font in the title.
From 2010 09 01 Thomas Train Scrapbook
In the upper right, J’s laughing hysterically, not crying or screaming.
From 2010 09 01 Thomas Train Scrapbook
29. July 2010 · 4 comments · Categories: Uncategorized · Tags: ,
From 2010 07 29 Funnel Cakes!

Wow, it’s been a while since I did a food-related blog post. I used to do them quite often, but I hadn’t done anything too blog-worthy lately…

…until today.

While Timmy’s in New York enjoying some Grammy and Grampy time, Jacob’s been enjoying a rare moment of “only-child-ness” here. Today at the commissary, I asked Jacob what kind of snacks he might want, and his answer was “funnel cakes like at the ball park”.

Sigh. I was expecting an answer like “tortilla chips” or “Nutter Butter cookies” or something more normal like that.

But in typical Major-Mom-the-Overachiever fashion, I said “Okay!”. Whipped out my handy-dandy iPhone and surfed for a basic recipe so I could gauge what ingredients I might need to pick up while at the commissary. Looked like all I needed was some vegetable oil (since I had just enough to fry up the cakes).

So here we go. In this case, I wasn’t looking for anything for mass production or anything super complicated in terms of batter preparation. This recipe seemed to fit the bill:

Easy Family-Portioned Funnel Cake Recipe on Cooks.com

Let’s start with the “hardware”, as Alton Brown would say: my trusting cast-iron skillet and a bottle of Crisco oil. Pardon the schmutz in the skillet, it’s burnt kalbi marinade from when the grill ran out of propane in the middle of cooking and I had to break out the skillet. Like I said, trusting!

From 2010 07 29 Funnel Cakes!

Instead of a traditional funnel, I figured I’d have some fun with a decorator piping bag fitted with my wide tube metal tip:

From 2010 07 29 Funnel Cakes!

Then I put together the batter, which was so easy, you guys don’t even need step-by-step photos. Just combine everything and mix well, like a pancake batter:

From 2010 07 29 Funnel Cakes!

While you were making the batter, you should have filled the skillet about halfway with oil and began to heat it at medium heat (at least, that’s what I do with my electric range). Use a test droplet of batter in the oil to gauge readiness — when the droplet of batter bubbles animatedly, you’re ready. This should be about 370F or so, but I can’t find my candy thermometer to check absolutely, sorry.

Filling the piping bag is pretty tricky. You can also use a quart-or-larger sized zip-top bag with a corner cut out to do this. I used a cup and propped the piping bag in it, then filled the bag and QUICKLY moved it to the batter.

From 2010 07 29 Funnel Cakes!

By squeezing the bag, I could control the flow a bit, better than with a funnel.

From 2010 07 29 Funnel Cakes!

I didn’t use enough oil today…the funnel cake stuck to the bottom at first, and I used my cooking chopsticks to nudge it off the bottom of the pan and let it float to the top.

From 2010 07 29 Funnel Cakes!

Unfortunately, when I flipped the first funnel cake over after about 90 seconds, the golden-brown-deliciousness was marred by flakes of burnt kalbi-marinade. Oops.

From 2010 07 29 Funnel Cakes!

So we’ll just pretend those flecks aren’t there from here on out:

From 2010 07 29 Funnel Cakes!

Remove the funnel cake to a brown-paper bag or papertowels (I prefer the brown paper):

From 2010 07 29 Funnel Cakes!

Dust with powdered sugar or Hershey’s syrup, and you’re all set:

From 2010 07 29 Funnel Cakes!

Did I mention Jacob has been the photographer for this blog post so far? Even Jacob knows I like showing off the details:

From 2010 07 29 Funnel Cakes!

But here’s one of Jacob enjoying his snack:

From 2010 07 29 Funnel Cakes!

So in conclusion, making funnel cakes is pretty easy, and you know what ingredients are going into the batter. I personally don’t care for frying foods in the house, but this time it didn’t seem to horrible. Monitor the frying closely and if you don’t overcook the cakes, it won’t be an oily mess — unlike what you probably get at the ball park or state fair.

26. February 2010 · 2 comments · Categories: Uncategorized · Tags: , ,

Meet Scruffy, Jacob’s very first Webkinz toy. He got Scruffy for his 5th Birthday from a preschool friend. Webkinz are stuffed animals that come with codes so you can play with their alter egos online. It’s fun, safe, and more educational than I thought it would be.

From 2007 09 15 Jacob 5th Birthday

Once we signed him up for Webkinz World online, it opened up quite a world of computers for Jacob. Grammy Vollmer had fun buying Jacob several additional Webkinz, along with several birthday, Christmases, Easters, and preschool graduations later, Jacob’s up to 21 of these toys. Plus clothing for the toys, carry cases, zipper pulls, Christmas ornaments, and even a mouse pad at our desktop!

Timmy also has several, as we’ve all seen him toting around his favorite Webkinz, Thomas the Yellow Lab:

From 2008 06 21 DriveToPA_Beilers_ThomasStrasburg

Jacob’s original Webkinz, Scruffy the Golden Retreiver, was accidentally run through the washer/dryer a few months ago, and it was pretty mangled up. It looks nice and clean, but Scruffy’s head stuffing was all pushed to his body.

Jacob recently is on this phase where he rotates through which animals to sit up on his bed at night. Both boys love their animals, we put most of them in wicker baskets in one corner of their room. Jacob decided to give props to some of the animals he’s been ignoring lately, and Scruffy appeared last night. We explained why we think Scruffy has an empty head and Jacob took him to bed. All seemed well.

But then about an hour later, Jacob was back downstairs in tears — he had a bad dream about Scruffy getting unstuffed. About 5 minutes of comforting, cuddles and reassurances that Mommy would re-stuff Scruffy the next day, and Jacob headed back to bed.

So today I broke out my mending supplies and set forth to open up Scruffy.

And I was slack-jawed at what I saw….

From 2010 02 26 Webkinz stuffing?

I pulled FOUR pieces of knee-hi stockings out of Scruffy’s torso! I redistributed the poly-fiber stuffing that got pushed around and then put back the stockings. Sewed Scruffy back and he’s better…but clearly still traumatized from the trip through the washer and dryer. Jacob’s happy enough with it, I guess.

So…stockings to stuff Webkinz. I honestly don’t know what to make of it. I posted the above photo on Facebook and if you’re a Facebook member you can see all the comments generated. For anyone wondering, I didn’t stick the stockings up to my nose to check for odors or anything, but from the brief inspection of the stockings, they looked all crumpled up as if they’re fresh out of the packaging. That was encouraging.

My guess is that the factory in China that makes these animals solicits for the mistakes out of the pantyhose factory next door. Recycling in its own “special” way.

So there, the cat is out of the bag…I did a web search to see if anyone else had discovered or mentioned this, but so far my web searches have yielded nothing.

04. January 2010 · Comments Off on Harvesting the Poop! · Categories: Uncategorized · Tags: , , ,

Around Halloween, it got cold enough in our basement that I had to bring my worm bin upstairs to the living room. I keep my house pretty cool, but for the past 2 months my worms seem happy enough. We have been giving them about a pound of food scraps per week.

Other than giving them food, I sort of neglected giving them additional “bedding materials” since Thanksgiving, and today when I opened the bin to toss in some banana peels, I was greeted with an, um, odor. It wasn’t a horrible odor, but it was certainly different than what I had been smelling, which was just the smell of dirt.

I decided an emergency “worm castings harvest” was in order. I hadn’t done this yet, so I had to refer to a technique I had read several months ago. I attempted another popular technique of pushing the older, more processed castings to one side of the container, filling the empty side with clean bedding and fresh food. This didn’t seem to make a difference for the worms, many of them went to the clean side, but websites seemed to indicate a mass exodus from the “old side” and this simply wasn’t the case for me.

So here we go — I dumped out the contents of the bin and immediately tossed the newer bedding and food scraps back into the bin. The black tray there is the bottom of Howie’s crate from when he was a puppy. He no longer uses a crate.

From 2010 01 03 Worm Casting Harvest

Note the light on the right. This light is used to “scare” the worms into the center of the pile.

This project took me two hours — to slowly pick at the castings. The clumps of castings went into the buckets, while worms, food scraps and obvious areas of shredded paper went back into the bin.

From 2010 01 03 Worm Casting Harvest

From 2010 01 03 Worm Casting Harvest

From 2010 01 03 Worm Casting Harvest

By the way, yes, those are margarita mixer buckets you see there. Great for gardening jobs!

So…as you can see, the pile works down pretty nicely, with a bit of patience.

From 2010 01 03 Worm Casting Harvest

I guess now’s a good time to mention that my castings were chock full of cocoons that I was attempting to save as well.

From 2010 01 03 Worm Casting Harvest

A view of a hunk of casting with worms and cocoons.

From 2010 01 03 Worm Casting Harvest

Now for the cool part — as I pick away at the castings, the worms are continuing further and further into the center of the pile to avoid the light. But at a certain point, the pile becomes nothing but worms!

From 2010 01 03 Worm Casting Harvest

From 2010 01 03 Worm Casting Harvest

From 2010 01 03 Worm Casting Harvest

From 2010 01 03 Worm Casting Harvest

Then, it’s easy to pick up the clump of worms and toss them back into the bin:

From 2010 01 03 Worm Casting Harvest

From 2010 01 03 Worm Casting Harvest

Jacob won’t touch the worms, but Timmy enjoys checking them out!

From 2010 01 03 Worm Casting Harvest

I filled both of these buckets with castings, I’d guess about 10-12 lbs. total! There are still a number of baby worms in the buckets, ones that I couldn’t easily pick out of the castings…I don’t know if they’ll survive in the basement, either from the cold or from the lack of food scraps. For now the buckets are simply in a giant Ziploc bag in the basement. It had been on my mind to toss the castings into my garden plot immediately (after all, wasn’t that the point of all this effort?), but it’s currently under about a foot of snow.

From 2010 01 03 Worm Casting Harvest

There you have it! I’ve successfully harvest castings from my worms! I’m so excited about that.

However, I’m not sure I like the two-hour-long pick-fest with the castings. I’m eyeing this apparatus for future use.