
Halloween is coming! Whoo hoo! I’ve been a bit lazy about the decorations, in part because of the move coming up, in part because I have a couple weeks of work right now and my hours are pretty crazy. Next week I’ll probably put up our ghost decorations…I sold most of our pumpkin stuff at our yard sale. I feel that ghosts need to be my signature Halloween decoration — it keeps me from buying everything I see, that’s for sure!
As usual, in September I ask the boys what they’re interested, and I knew what they were going to suggest: Mario and Luigi! You know, from the Nintendo video games?
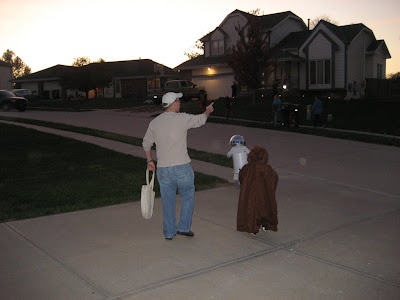
And as usual, I rarely end up putting my kids in those commerically available Halloween costumes. It doesn’t mean I never get them a store-purchased costume, sometimes they want to do something that I couldn’t possibly make on my own. Last year I bought Jacob the Jengo Fett costume, complete with the battery-operated gun. A few years back I got the Jack Sparrow outfit with which we got lots of use!
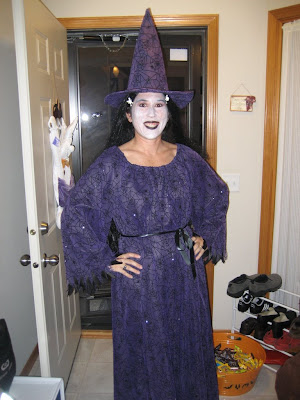
However, you can call me elitist, but really it’s that I think part of the fun of Halloween is letting those creative juices flow and scrounging together what you have for a costume. I enjoy it very much! I’m very fortunate that my Mom made most of my costumes and did a great job on them!
 |
| From 1989. My Mom made the shirt and skirt. I wore this in college too! |
I have nightmares of those costumes from the 70s and early 80s that were made of plastic and had a picture of what you were representing plastered across your chest. I think this blog post says it all (I highly encourage clicking on this link, if nothing else…it’s VERY funny!). Today, you won’t find costumes like that, I think the natives cried foul on wearing Hulk Hogan’s face across your chest.
 |
| Halloween 1981 or 1982. So I was around Jacob’s age here, wow! I’d rather be a homemade tiger-rabbit hybrid than wear Darth Vader’s face on the front of a plastic costume! |
So let’s talk about what’s commercially available for Mario and Luigi, shall we?
Here’s a link to the special Mario and Luigi page at Costume Express, which is a pretty good costume retailer. I usually get coupons in the mail and sometimes the deals get quite good. I don’t mean any disrespect to Costume Express, for sure! They’ve served us well in the past.
But who came up with this?

I’m not a big fan of the polyester unitard at all. Not that they can’t pull off an effective look, but perhaps it’s the principle of the shoddy sewing for the price. Each of those costumes (including the inflatable belly) is retailing for ~$40 + tax. I immediately told myself “I think I can do better than this, for around the same cost!” After all, Danielle C. of Akron, OH did it last year.
So I mentally inventoried what we’d need:
1. Overalls
2. Red and Green long-sleeved t-shirts
3. Red and Green hats
4. Big bushy moustaches
5. A way to make my boys look fat
Getting #2-4 will be easy. I have the shirts and hats already, and with some felt, I can put the “M” and “L” on the hats. We’re up the street from a huge Halloween costume store, getting bushy moustaches will be no problem either. If anything, we have plenty of dark brown eyeliner (see the Jack Sparrow picture above).
As for #5, I think some blankets or small pillows will take care of the fat bellies, if we even need to do it. Maybe not…
So what about the overalls? Overalls for older boys are rather difficult to come by. I looked at several kids clothing stores and 5 thrift shops. All. Over. Omaha.
I bid 3 different times on Size 8 overalls on eBay. Was outbid pretty quickly — I didn’t plan to spend more than $15 on a pair of second-hand overalls, but other people were, fine. On one of the pair I was “sniped” at the last second and lost the bid.
How about new overalls? The most popular model appearing on Google’s shopping application was this fine pair by Carhartt: $48.
How on earth did Danielle C. of Akron, OH just run out to the thrift store and pick up overalls for her kids????
And then a lightbulb went off in my head: HEY! I could SEW their overalls! After all, I can easily get some lightweight denim at $6-8 per yard, get a pattern and some buckles, and be on my way, right?
Not so easy either — I went to Jo-Ann Fabrics, Hancock Fabrics, Hobby Lobby and even Walmart looking for patterns. A web search yielded ONE pattern: Kwik Sew #2427.

No fabric retailers in the area carried this pattern and I found ONE online retailer and I quickly placed an order. I talked to the owner of the retailer and was assured I’d have the pattern by mid-week. It’s already on its way 🙂
Today at Hobby Lobby I picked up the other materials I needed (with a coupon, of course!). I’m pretty sure I’ve made all the financial investment I need to for this, and my grand total (including the pattern + shipping) stands at about $62. Much better than the $80 I’d have to pay for polyester unitards. But less than the $30 Danielle C. of Akron, Ohio claimed to have spent.

I’ll start on this project next week, I’m working for the next 4 days and probably won’t have the pattern ready until Thursday…and the family is taking a camping trip this coming weekend!
I haven’t sewed anything in a while…the last article of clothing I sewed was Jacob’s Mace Windu cape in 2008. Most of my sewing machine’s workouts have been with sewing patches on Dave and Jacob’s scout uniforms and hemming up/letting down pant legs.


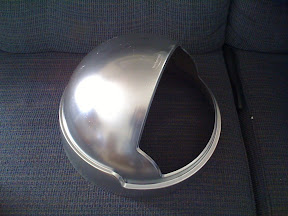
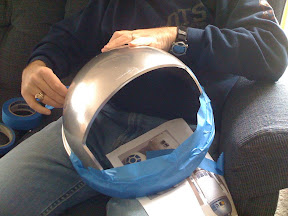
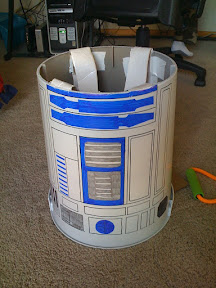

 So first I used a drill to put holes along the sides of the bottom edge.
 A close up of the holes.
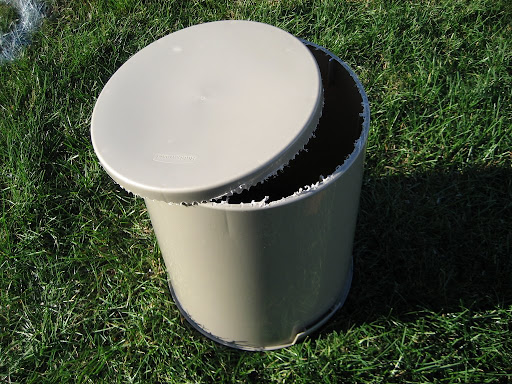 So with a couple slices with a keyhole saw, the bottom popped right off. But we were left with all this debris. I started with some 100 grit sandpaper, but that was futile…
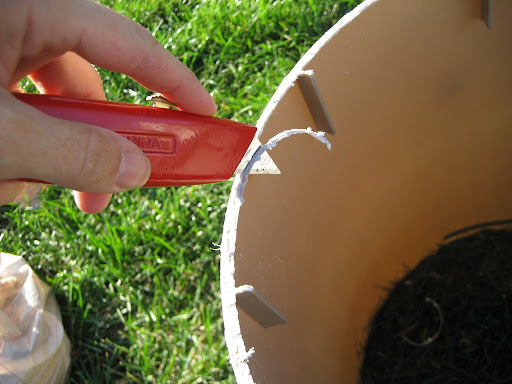 But a box-cutter was perfect! I was able to shave off the excess plastic, then used the 100 grit sandpaper to fine-tune the edge.
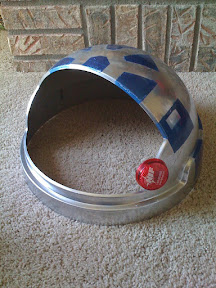
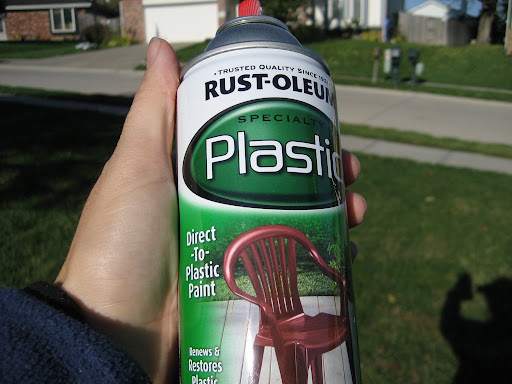 Next task, painting the wastebaskets. We could only find that silver/coppery colored can, so it had to be painted white…
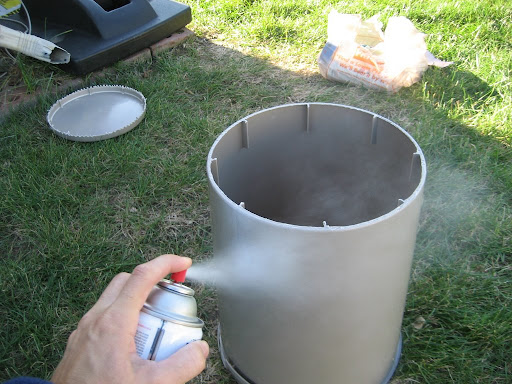 I wanted low humidity and not much wind, but in Nebraska in the fall, forget it! Today is the last dry day for a while, but it was quite breezy so I just made sure to remain upwind of the spray and we did okay.
Recent Comments